Components
Components are the functional units of your service or IT infrastructure. For instance, your website, mobile application, APIs, servers, databases, etc. are all components. It is advisable to create a component for every functional or architectural division of your infrastructure. Resources or services used by the end user can be added as components.
Adding a component
To add a component follow the steps mentioned below:
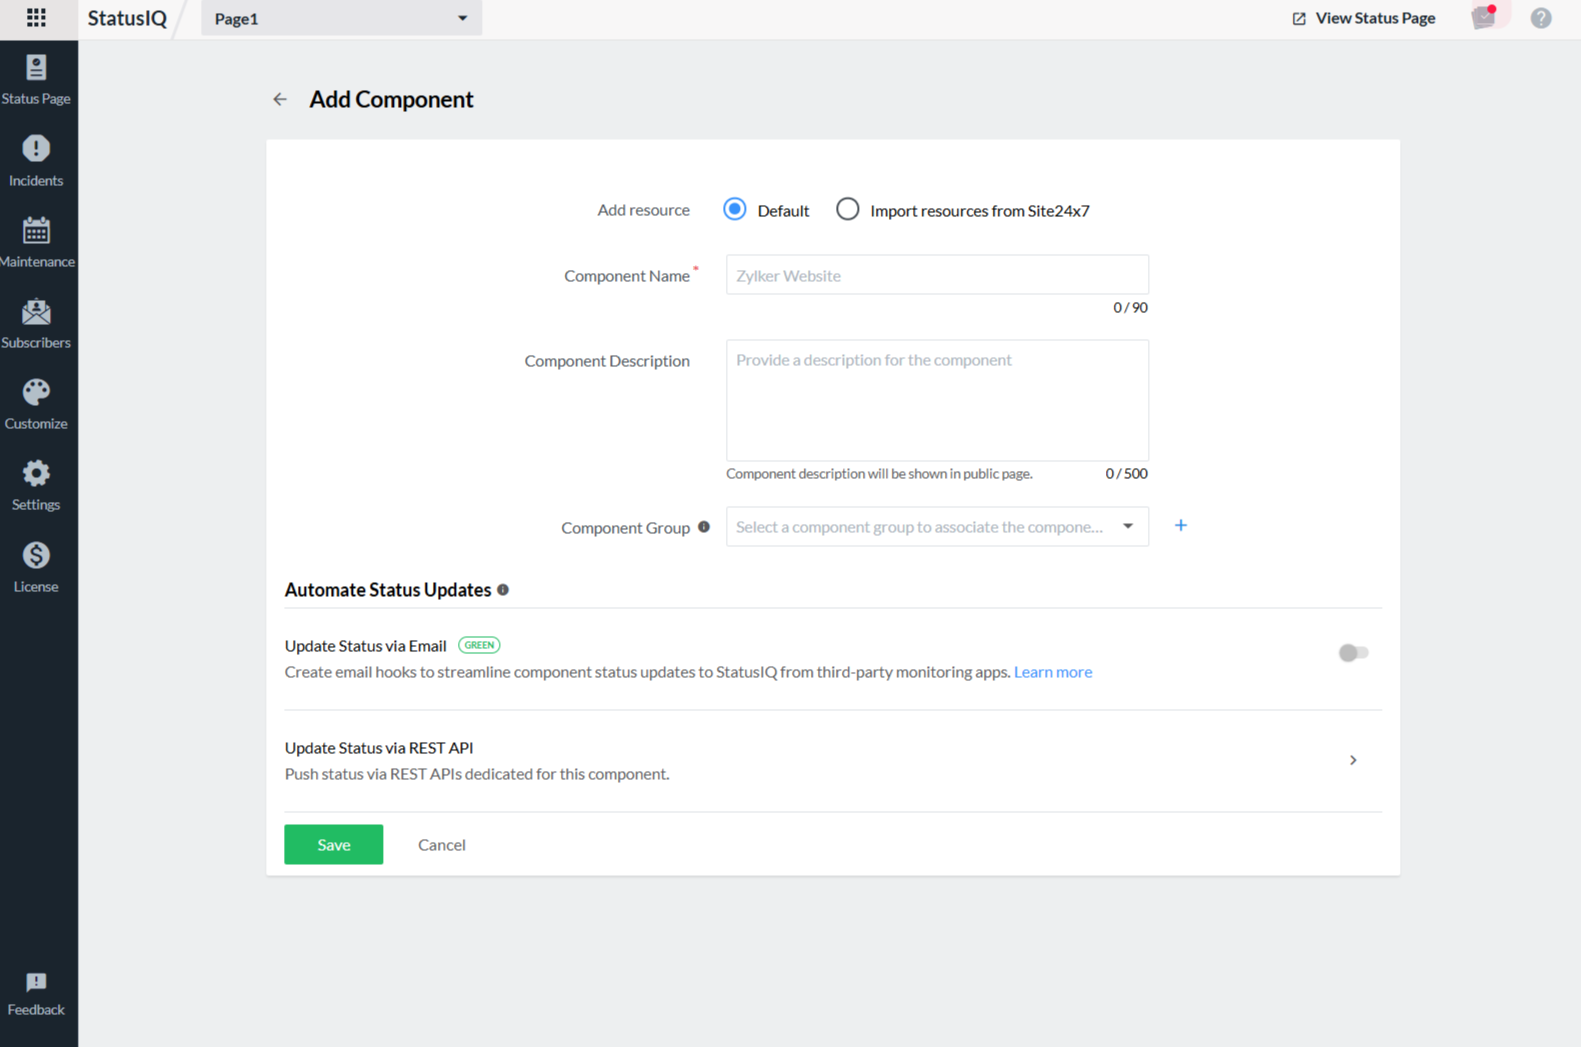
- Go to your Status Page, and click the Add Component button. You will be redirected to a new page. In the new Add Component page that opens, fill in the following fields:
- Component Name: Provide a name for the component for your customer to view.
- Component Description: Provide a brief description for the component.
- Component Group: Choose or create a component group to associate the component with. This is an optional field.
- Automate Status Updates: You can manually change the status of a component as well as enable the automate status updates option if you want to change the status via any other monitoring tools or any in-house monitoring tool.Learn more about status automation.

- Click the Save button, and your new component will be added.
Edit Component
To edit an existing component follow the given steps:
- On to the Status Page, click on the
 icon next to the component name in component summary section, and click Edit.
 - On the Edit Component page that appears, edit the data provided in the fields and click Save.
Import Monitors from Site24x7
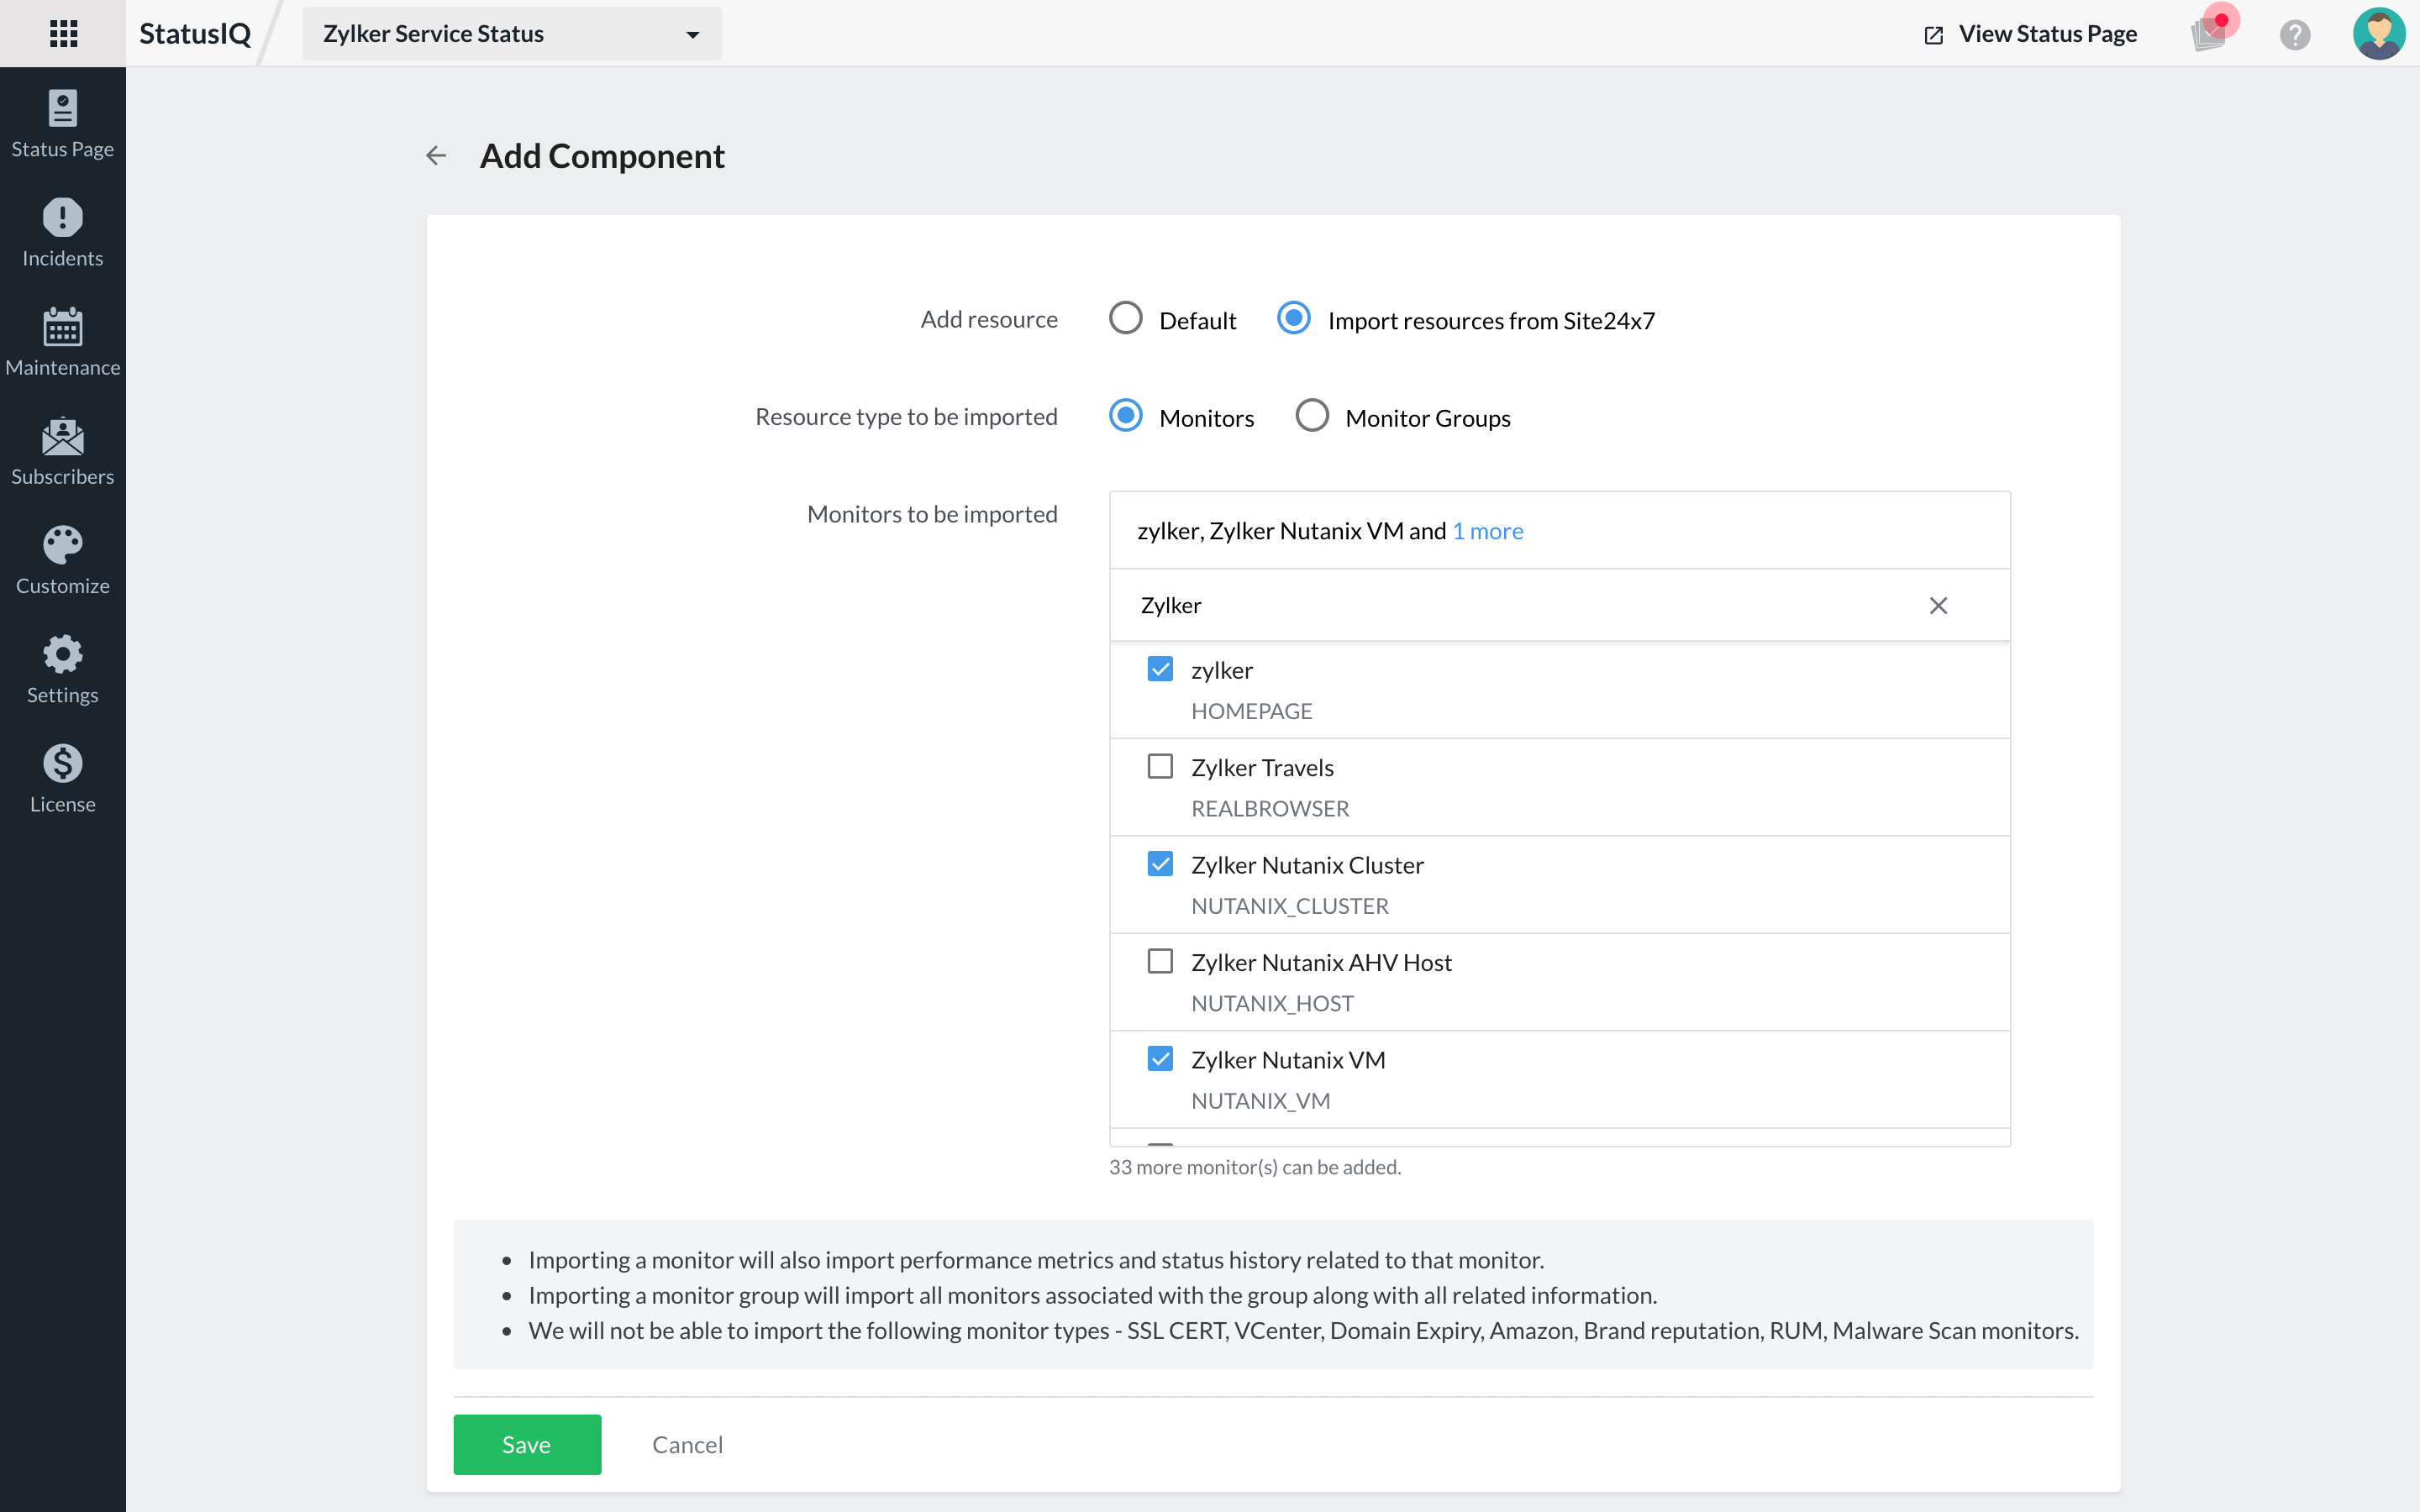
The Import Monitors feature can help you import your monitors in bulk from Site24x7 as Components to StatusIQ. This can help reduce the time taken to create multiple components in StatusIQ and associate them to Site24x7 resources. To import monitors from Site24x7:
- Log in to StatusIQ. Then, navigate to Status Page > Add Component.
- On the Add Component page, enable the radio button near Import monitors from Site24x7 in the Add resource field.
- Choose Monitors in the Resource type to be imported field.
- Then choose the monitors of your preference from the options provided next to Monitors to be imported field.
- Click Save.

If you own a Basic or Free page you can add 10 components. If you're using a Green plan, you can add up to 50 components. If you're using a Blue plan, you can add up to 200 components. Once imported, the monitors can be viewed in the Component Summary section after 5-10 minutes.
Editing Imported Monitors
To change the name of the imported monitors, you can click the ![]() icon next to them. In the Edit Component window that opens, you can provide the Component name and the Description. Then click Save to save your changes.
icon next to them. In the Edit Component window that opens, you can provide the Component name and the Description. Then click Save to save your changes.
Learn how to import Monitor Groups to StatusIQ as Component Groups.
Deleting a component
To delete a component, go to the Status Page, and click on the ![]() icon on the right side of the component. Select Delete, and you will be prompted with a pop-up message asking whether you want to delete the component. Choose Delete, and your component will be deleted.
icon on the right side of the component. Select Delete, and you will be prompted with a pop-up message asking whether you want to delete the component. Choose Delete, and your component will be deleted.
When you delete a component, all the status history and performance history of the component will also be deleted.