Alarms Category
Alarms Category helps you categorize alarms based on attributes and configure a custom sender email address that include the attribute name. It focuses on teams to work on a specific set of attributes and use the filters to categorize efficiently and use them in the Alarms tab.
This feature also helps operation engineers and teams stay organized by keeping track through a set of alarm categories. To navigate to Alarms Category:
- Log in to Site24x7.
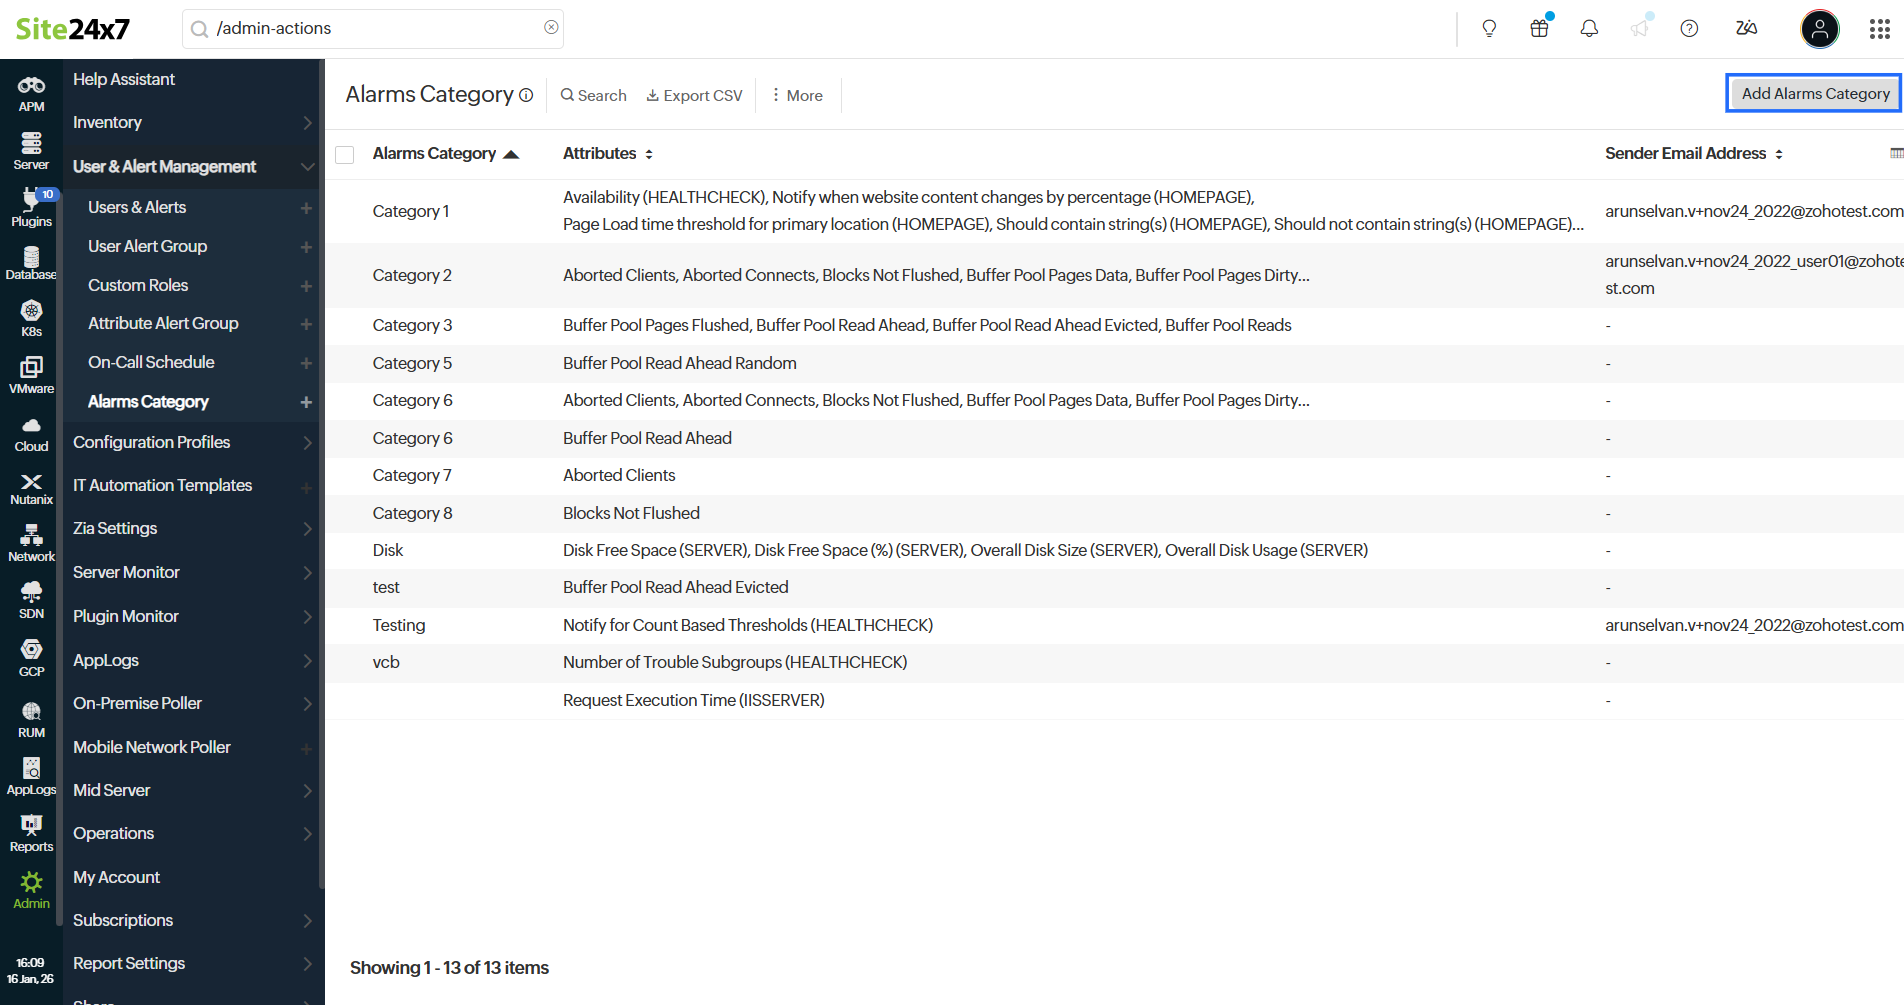
- Navigate to Admin > User & Alert Management > Alarms Category.

- Click on Add Alarms Category on the top-right corner of the page.
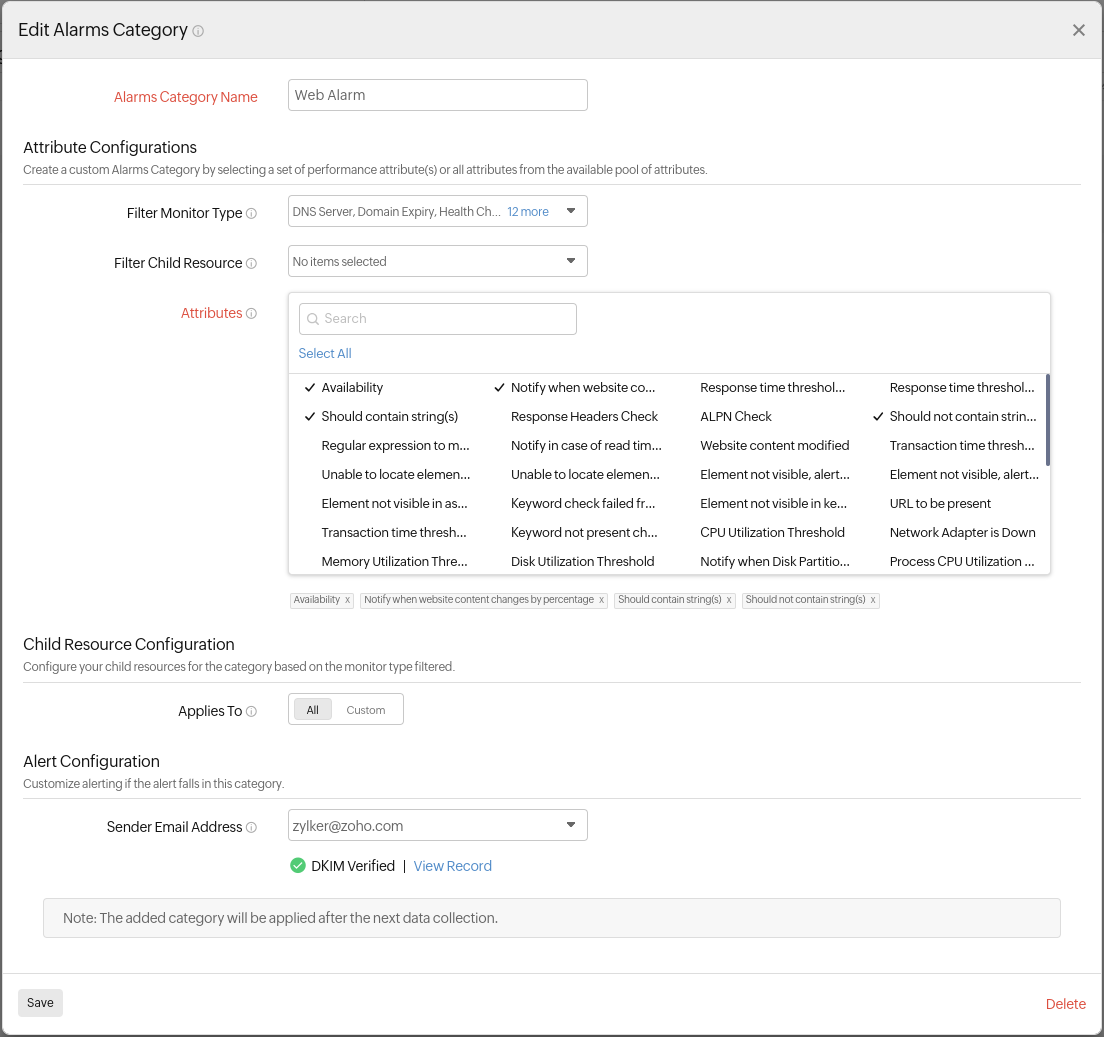
- In the form that opens, assign a name for the alarm category you wish to create.
- Fill in the appropriate details in Attribute Configurations.
- Filter Monitor Type: Sort and view the performance related attributes of the selected monitor types.
- Filter Child Resource: You can sort and view the performance related attributes of the selected child resource types.
- Attributes: After using the Filter Monitor Type and Filter Child Resource fields to filter out the attributes, you can specifically choose attributes from this field either by manually searching for attributes or choosing from the list provided.
- Select the preferred option in Child Resource Configuration.
- All: Select All to apply the chosen child resources for all selected attributes.
- Custom: Select the Custom option to choose a particular child resource for which you wish to apply the attributes.
- In the Alert Configuration section, use the Sender Email Address field to choose the email address from which you wish to receive Site24x7 alerts.
NoteIf you don't specify an email address, alerts will be sent to the configured default email address. To customize the default address, navigate to Admin > Report Settings > Customize Reports > Sender Email Address and make the necessary changes.
-
DKIM verification for your sender email address: The default email address will remain in use until DKIM verification is completed. DKIM verification is mandatory for secure email alerts. Follow the steps in this document to verify DKIM.
NoteIf a DKIM record remains unverified for more than 60 days, we'll clear the existing record and generate a new one. Please update the new DKIM record on your end to complete the verification process.
Once the DKIM verification is done, please ensure you retain your DNS record to keep receiving emails from the customized sender address. If you do not retain the DNS record, the emails will be sent from noreply@site24x7.com. - Click Save.
You can also configure an attribute in alarms category by adding it using the Alarms > Category Filter drop-down. Click +Add Alarms Category at the end of the drop-down and add an alarm category. The added category will be applied after the next data collection.
To add a new email address, navigate to User & Alert Management > Users. You can add an email as an alert contact and verify it. Alerts that this email address will receive will include persistent and escalation alerts.

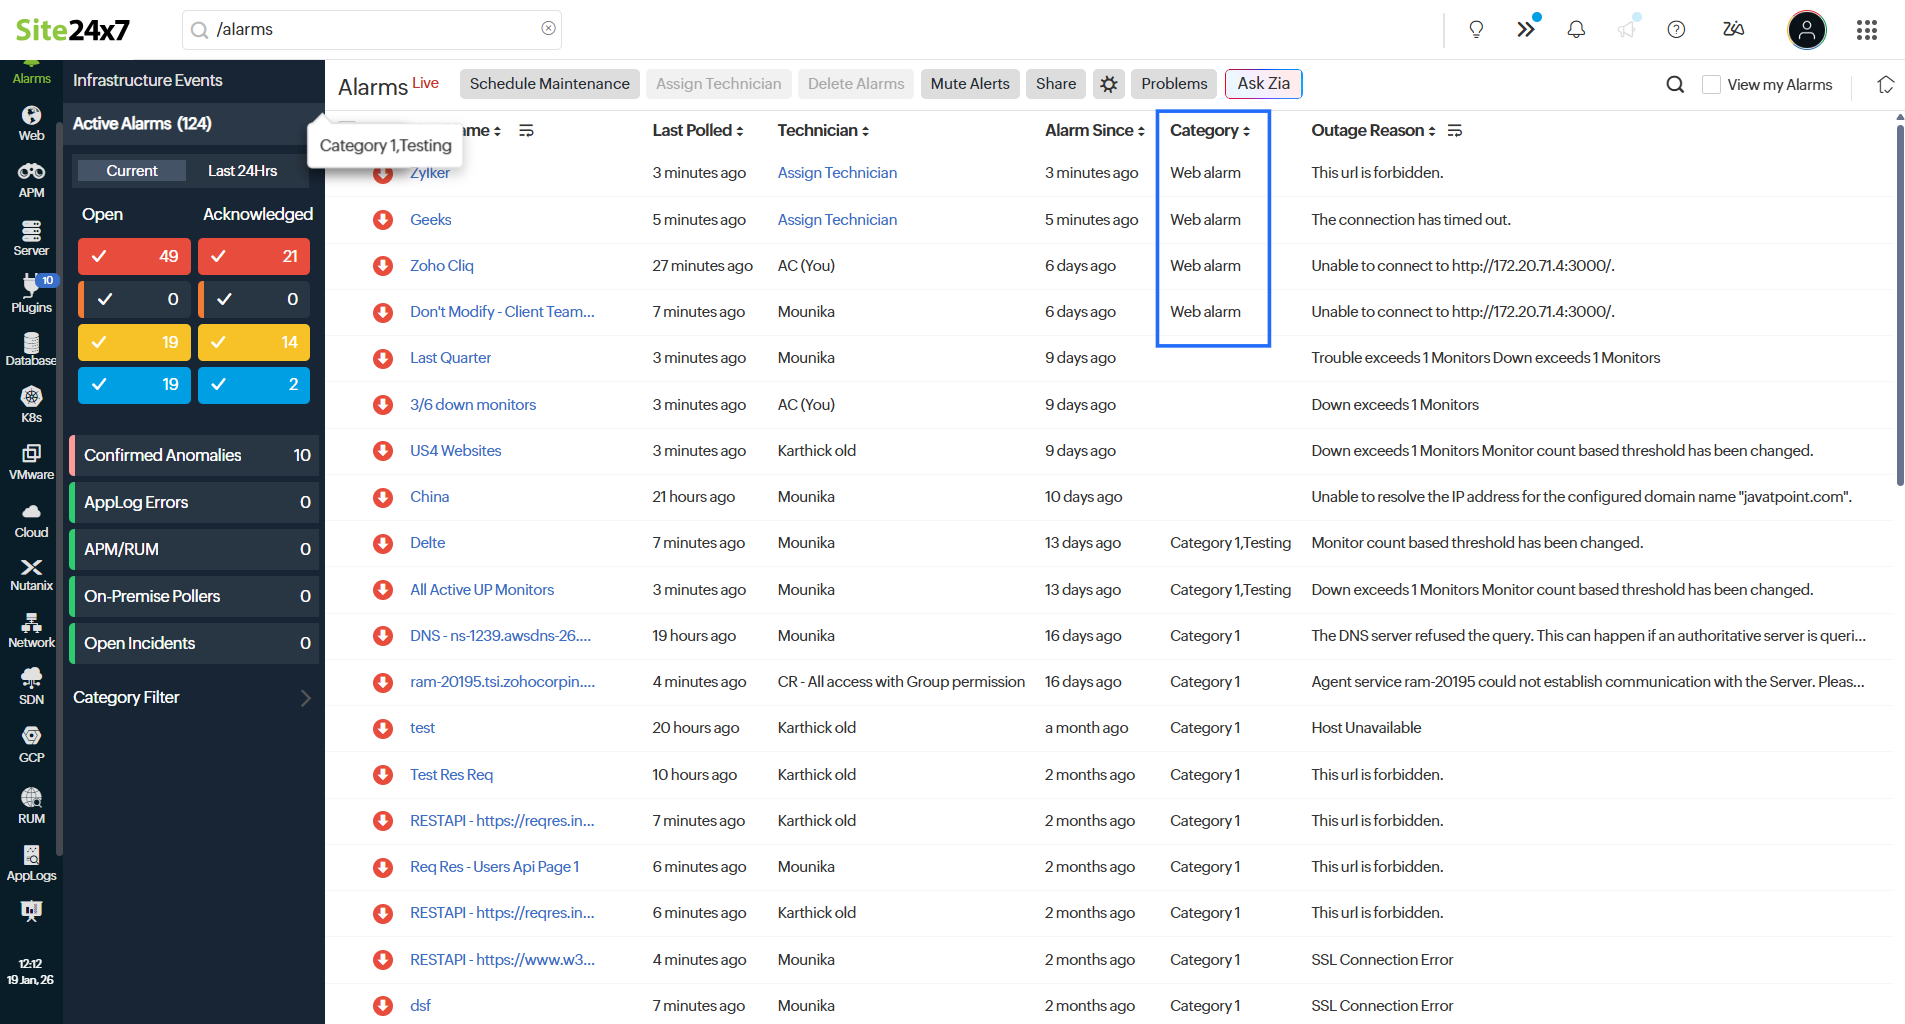
To filter alarms based on categories, navigate to Alarms > Category Filter and check the Category column.

