
Forward Logs via Webhook
A webhook lets you push your AppLogs to any HTTPS endpoint you control, such as Splunk, Datadog, Elastic, or a custom SIEM tool.
Unlike cloud storage destinations, webhooks don't require a cloud account integration. Just provide the endpoint URL to Site24x7—and an authentication header, if needed—to start forwarding logs to your existing pipeline.
Key capabilities of webhook
This integration provides the following capabilities:
- Sends AppLogs to any HTTPS endpoint as batched HTTP POST requests.
- Supports optional authentication headers for secured endpoints.
- Supports gzip compression to reduce the request payload size.
- Sends logs in NDJSON, JSON, or CSV format in the request body.
Prerequisites
- No cloud integration is required. You only need the destination endpoint URL and, optionally, an authentication header.
- Ensure your endpoint accepts HTTPS POST requests and any configured authentication header.
Configuring webhook integration
- Log in to Site24x7.
- Navigate to Admin > Third-Party Integrations.
- Click on the plus icon + next to the Log Forwarding to open the supported destination list.
- Select Webhook and click Integrate Now.
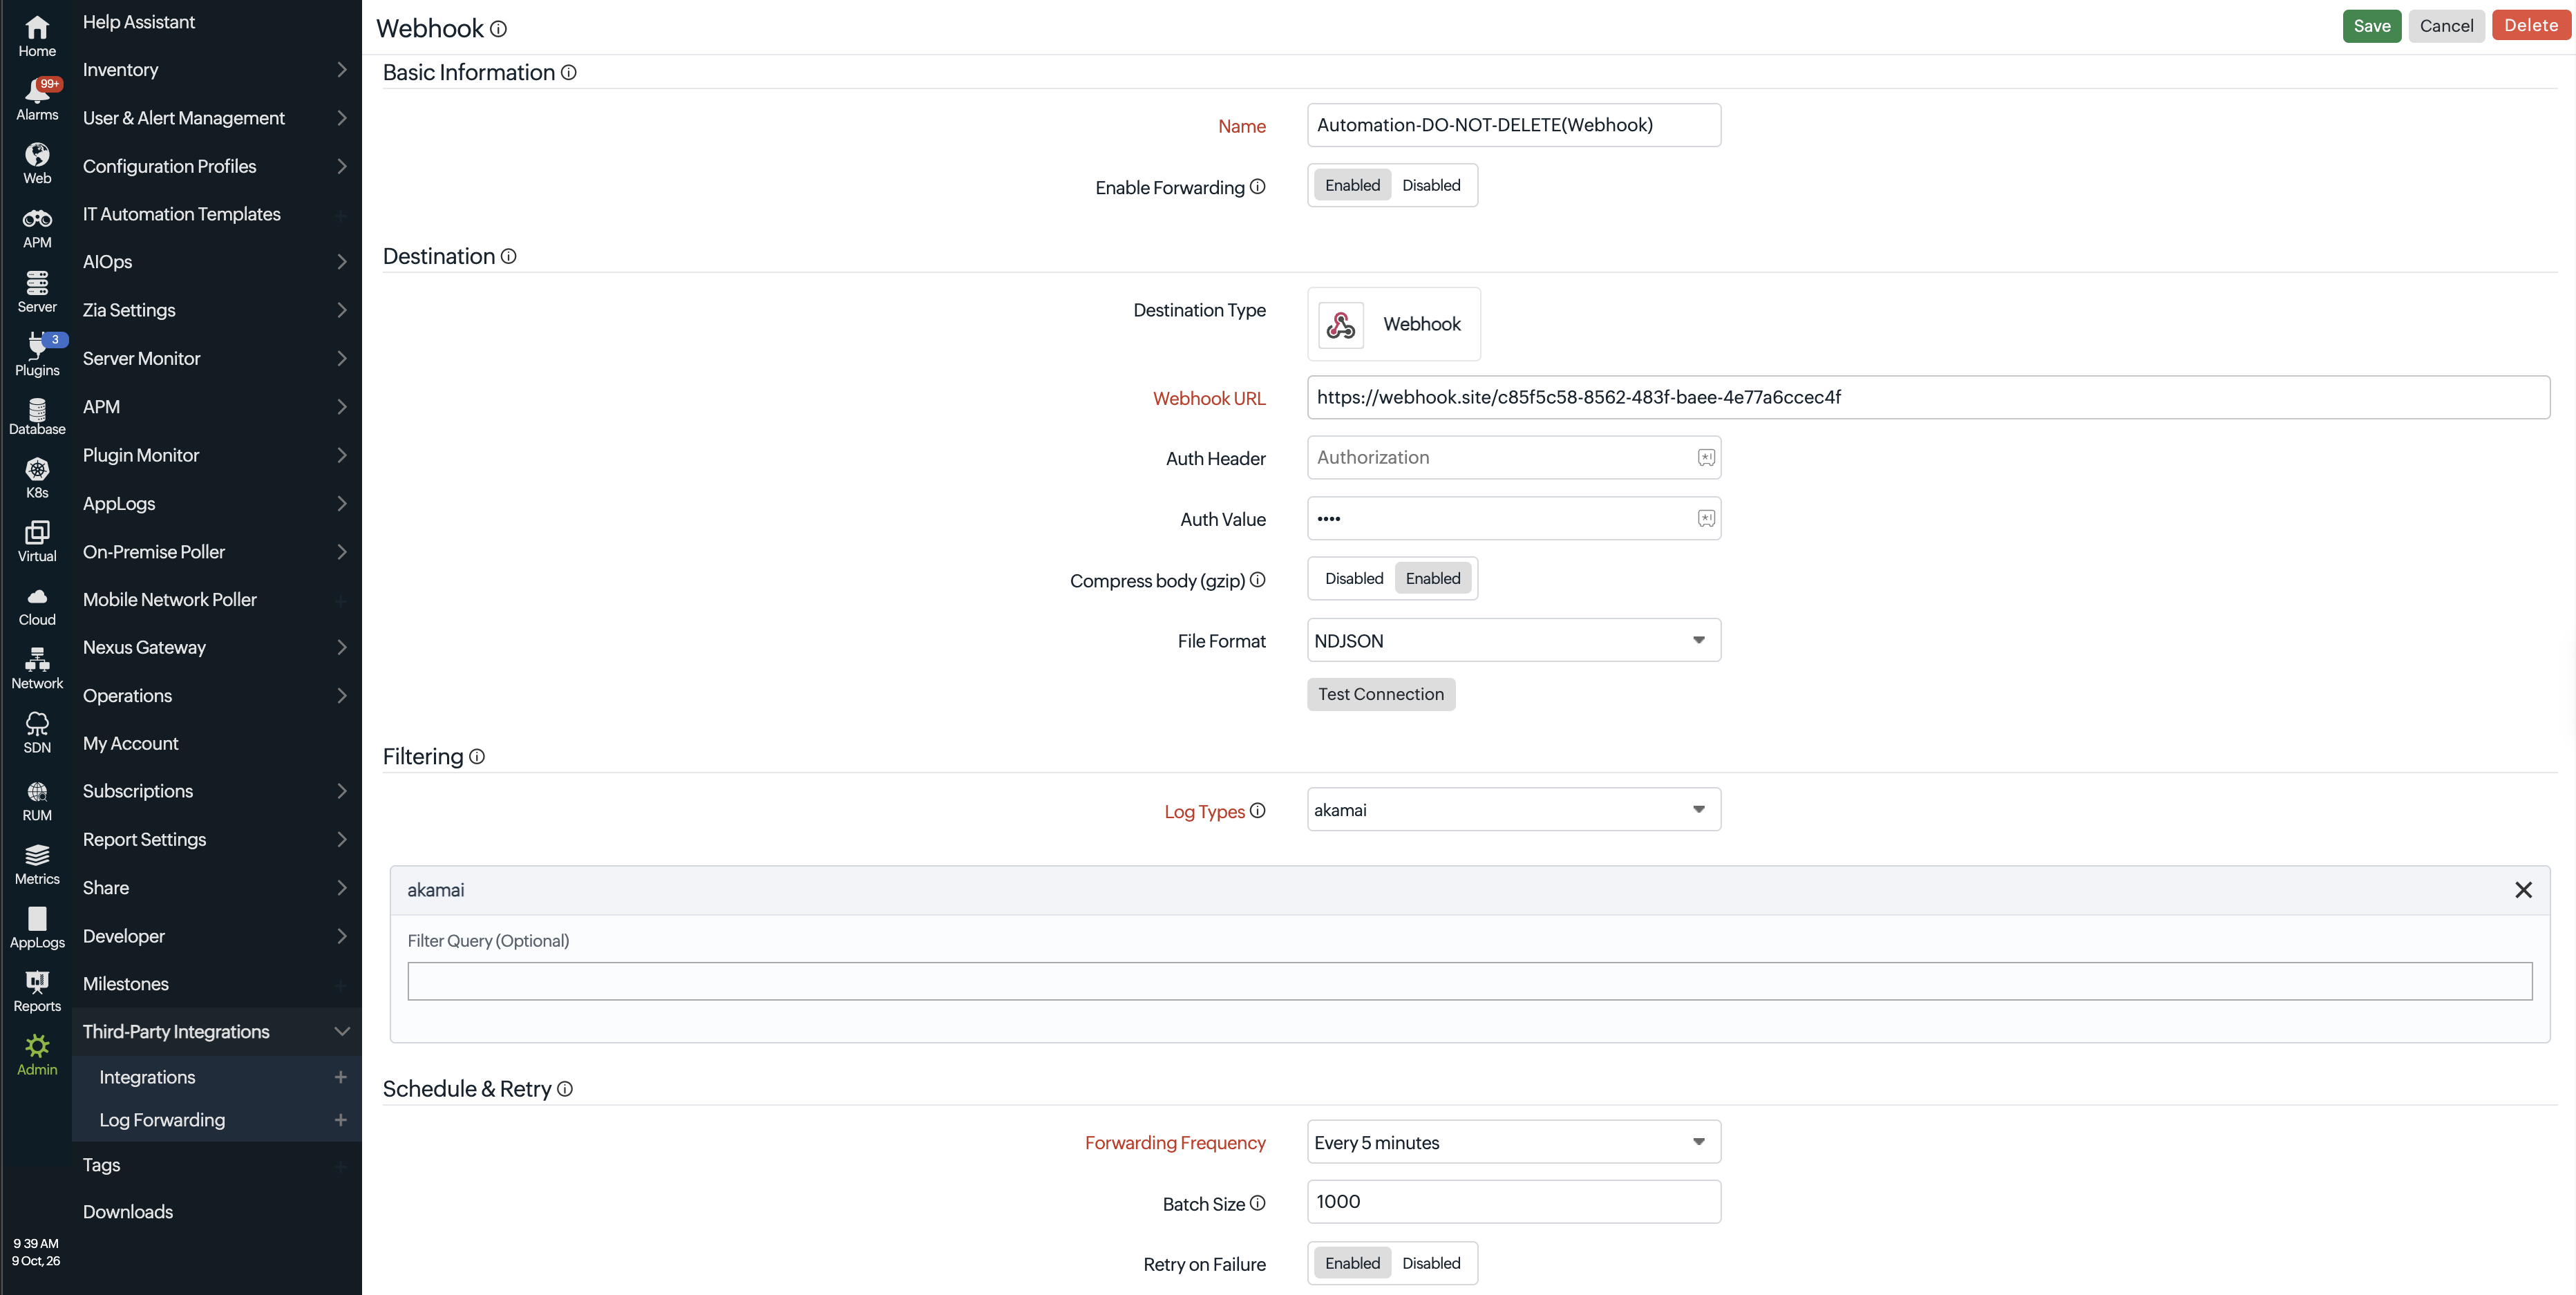
This will open the integration page for the webhook destination. Enter the following details:
- Basic Information: Provide the details of the destination to which the logs will be forwarded.
- Name: Enter a label to identify this configuration.
- Enable Forwarding: Toggle to Enabled to activate the configuration once saved.
- Destinations: Choose where logs should be forwarded and configure destination credentials.
- Destination Type: By default, Azure Blob is selected.
- Webhook URL: Enter the HTTPS endpoint that will receive each batch as a JSON array in the request body.
- Auth Header: Optionally, you can enter the name of an authentication header to send (for example, Authorization).
- Auth Value: Optionally, you can enter the value for that header (for example, Bearer
). - Compress body (gzip): Toggle to Enable to send the request body gzip-compressed.
- File Format: Select the file format NDJSON (default), JSON, or CSV. Learn more about the file formats.
- Click Test Connection to test the connectionand confirm the bucket is reachable and writable.
- Filtering: Restrict which logs are forwarded by log type and query.
- Log Types: Optionally, you can select the 100+ default log types whose data you want to forward, and enter a Filter Query to forward only matching records. You can select more than one log type.
- Click the X icon on the respective log type to remove the query.
- Log Types: Optionally, you can select the 100+ default log types whose data you want to forward, and enter a Filter Query to forward only matching records. You can select more than one log type.
- Schedule and Retry: Control how often logs are forwarded and retry behavior occurs upon failure.
- Forwarding Frequency: Select how often batches are written to the bucket; you can select any one from the following list:
- Every 1 minute
- Every 5 minutes
- Every 15 minutes
- Every 30 minutes
- Every 60 minutes
- Batch Size: Set the maximum number of records per object. Default is 1,000. Learn more about the batching and delivery options.
- Retry on Failure: Toggle to Enable to automatically retry failed deliveries.
- Max Retires: Enter a number of maximum entries the forward can fail.
- Forwarding Frequency: Select how often batches are written to the bucket; you can select any one from the following list:
- Click Save. Forwarding will begin with the next matching batch of incoming logs.
Note
Each webhook request includes an X-Idempotency-Key header generated from the batch contents. If the same batch is retried, the header value remains unchanged, allowing your endpoint to identify and ignore duplicate requests.
Managing the Webhook log forwarding configuration
- Navigate to Admin > Third-Party Integrations > Log Forwarding.
- Locate the configuration on the listing page. To make any changes, click the configured forwarding entry to open the Edit Configuration page.
- Click the hamburger icon
 on the right corner of each configured forwarding entry to perform the following actions:
- Click Disable forwarding to temporarily stop forwarding.
- Click Enable forwarding to resume the forwarding.
- Click Delete to remove it permanently.