SLA Settings
Set goals for your IT Team by setting SLAs per monitor, so that your customers are happy.
Add SLA Settings
- Login to Site24x7.
- Click Admin > Report Settings > SLA Settings.
- Click Add SLA in the SLA Setting screen.
- SLA Type: Select from the drop down the type of SLA you want to add. The different SLA monitoring types available are :
- Availability SLA: Allows to monitor whether the service performance metrics for the levels of availability is strictly adhered to.
- Composite SLA: Defines both the availability and response time SLAs under a single monitoring parameter.
- Response Time SLA: Checks whether the service performance metrics for the levels of availability and their corresponding service level objectives are strictly adhered to.
- For Availability SLA, Specify the following details:
-
- SLA Type: Availability SLA
- Display Name: Specify an appropriate name for the SLA you are going to register.
- Description: Mention a description that gives the importance of the registered SLA.
- Select Resource Type: Choose the appropriate resource type, for which you want to generate SLA.
- Monitors: Select the required monitors from the drop down to associate SLAs to these monitors.
- Monitor Groups: You can select multiple monitor groups from the drop-down menu. SLA will be scheduled for all monitors in these monitor groups.
- Business Hours: Select from the drop down the list of configured business hours. If not configured, see Business Hours.
- SLA Goal: Define the SLA Goal as Success or Failure. Also choose the relative parameter from the drop down and mention the goal value in percentage. You can also add multiple SLA goals by clicking on the plus symbol. Use color coding to differentiate multiple SLA goals. Click the colored icon where one can select the appropriate color for the goal from the color picker tool.
- Click Save.

- For Composite SLA, specify the following details:
-
- SLA Type: Composite SLA
- Display Name: Specify an appropriate name for the SLA.
- Description: Give a description that reflects the nature of the registered SLA.
- Select Resource Type: Choose the appropriate resource type, for which you want to generate SLA.
- Monitors: Select the required monitors from the drop down to associate SLAs to these monitors.
- Monitor Groups: You can select multiple monitor groups from the drop-down menu. SLA will be scheduled for all monitors in these monitor groups.
- Business Hours: Select from the drop down the list of configured business hours. If not configured, see Business Hours.
- SLA Goal: Define the SLA Goal as Success or Failure. Also choose the relative parameter from the drop down and mention the goal value in percentage. You can also add multiple SLA goals by clicking on the plus symbol. Use color coding to differentiate multiple SLA goals. Click the colored icon where one can select the appropriate color for the goal from the color picker tool.
- Define Service Level Objectives: Use the check box to enable the Availability and Response Time for each service level objective. Define your criteria from the drop down and add the required weightage in percentage for availability and response time.
- Click Save.

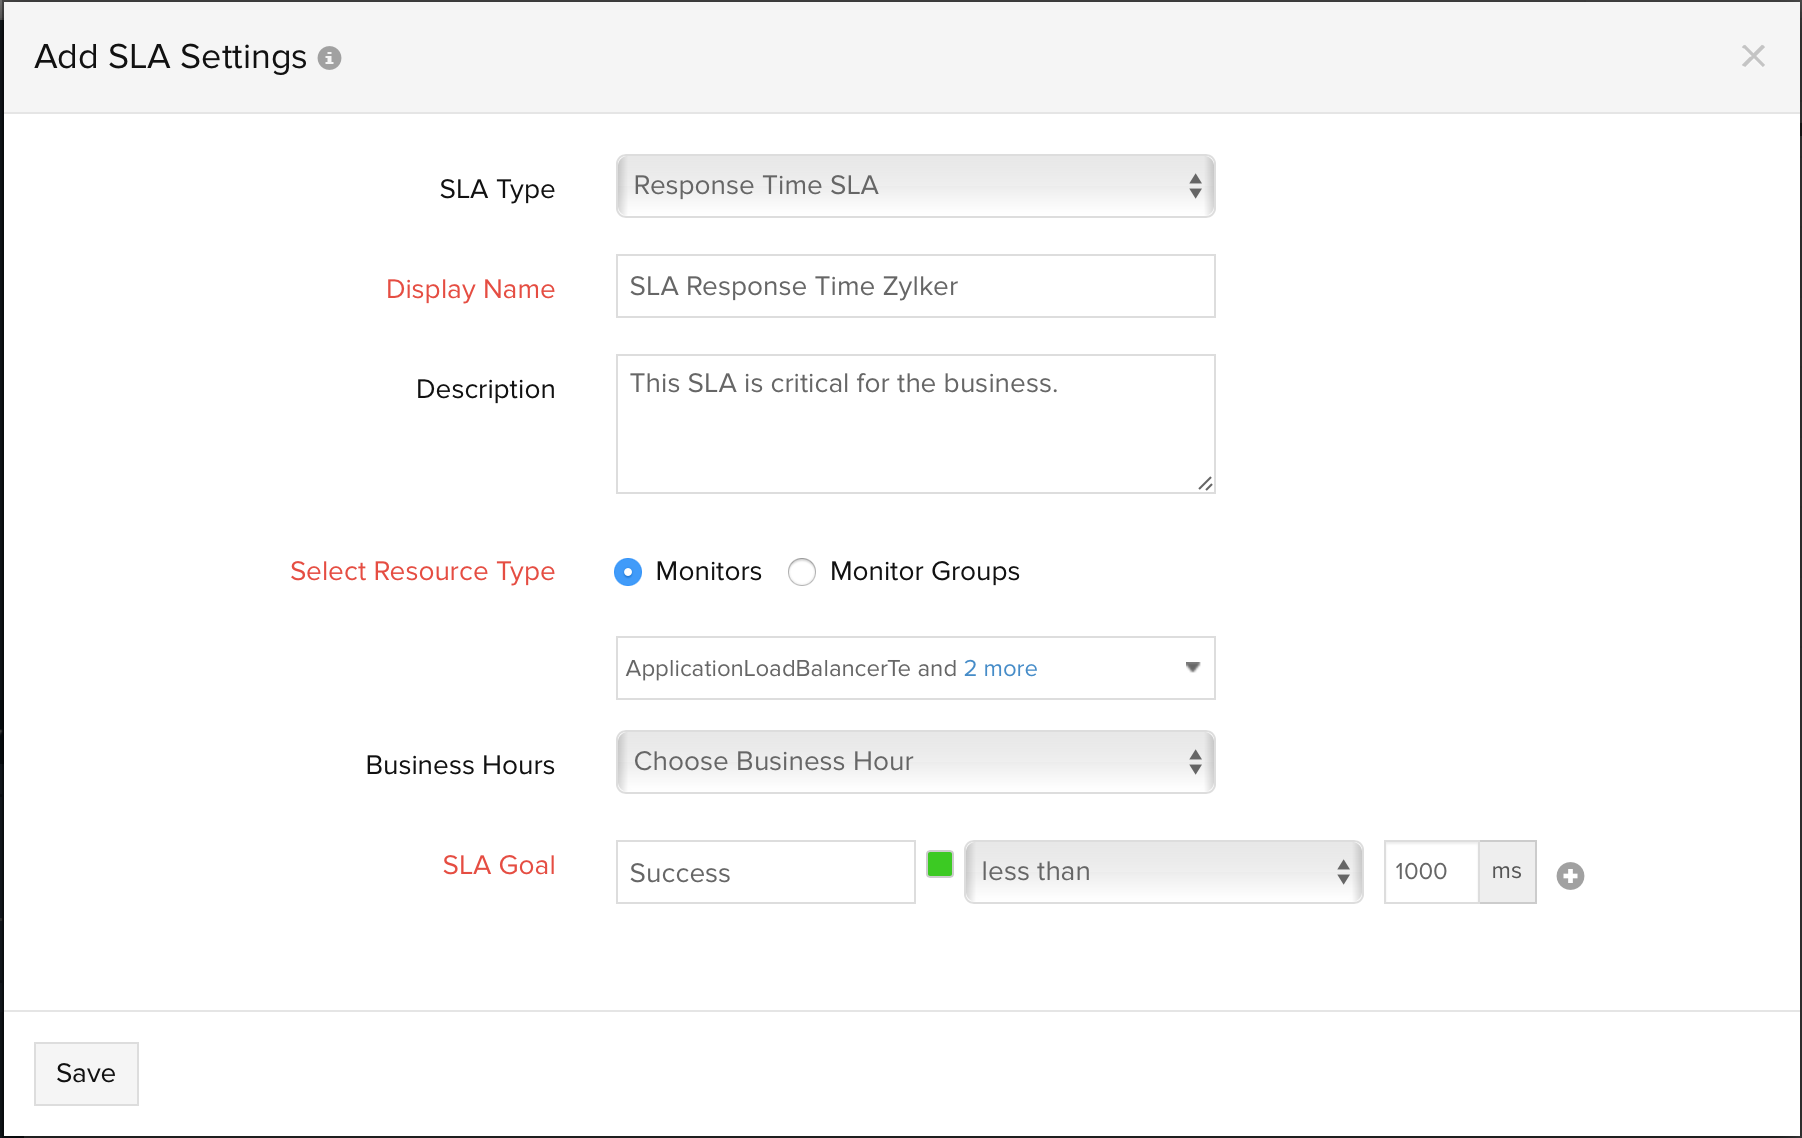
- For Response Time SLA, specify the following details:
-
- SLA Type: Response Time SLA
- Display Name: Specify an appropriate name for the SLA you are going to register.
- Description: Mention a description that gives the importance of the registered SLA.
- Select Resource Type: Choose the appropriate resource type, for which you want to generate SLA.
- Monitors: Select the required monitors from the drop down to associate SLAs to these monitors.
- Monitor Groups: You can select multiple monitor groups from the drop-down menu. SLA will be scheduled for all monitors in these monitor groups.
- Business Hours: Select from the drop down the list of configured business hours. If not configured, see Business Hours.
- SLA Goal: Define the SLA Goal as Success or Failure. Also choose the relative parameter from the drop down and mention the goal value in milliseconds. You can also add multiple SLA goals by clicking on the plus symbol. Use color coding to differentiate multiple SLA goals. Click the colored icon where one can select the appropriate color for the goal from the color picker tool.
- Click Save.

- The SLA created will be automatically listed in the SLA Settings screen along with other SLAs already created.
Edit a SLA Setting
- Click the preconfigured SLA which you want to edit.
- Edit the parameters which needs to be changed in Edit SLA Settings window.
- Click Save.
Delete a SLA Setting
- Click the preconfigured SLA in SLA Setting screen which needs to be deleted.
- This will navigate to the Edit SLA Settings window.
- Click Delete.
-
On this page
- Add SLA Settings
- Edit a SLA Setting
- Delete a SLA Setting
