My Account
My Account enables you to view and update your personal settings, modify your Site24x7 account settings and also control your organizational information. All your account information are categorized under three different sections, viz., Personal Settings, Account Settings, and Organization Settings. Based on your user privileges, you can view and modify your account settings.
- Login to Site24x7 client.
- Navigate to Admin > My Account.
- You're redirected to your My Accounts screen now.
How Can I Update ?
- Personal Settings
- Account Settings
- Organization Settings
- SAML Authentication for Single Sign-on
- Add Users
Personal Settings
Site24x7 uses Zoho Accounts, a service for single-sign-on to handle your personal account settings. You can gain insight and modify your critical personal information like: Site24X7 account name and email address, Site24x7 user role, and allowed groups. You can make the following changes as part of your Personal Settings:
- Edit Profile: You can modify your user profile. Learn more.
- Edit Profile Picture: Update your profile picture.
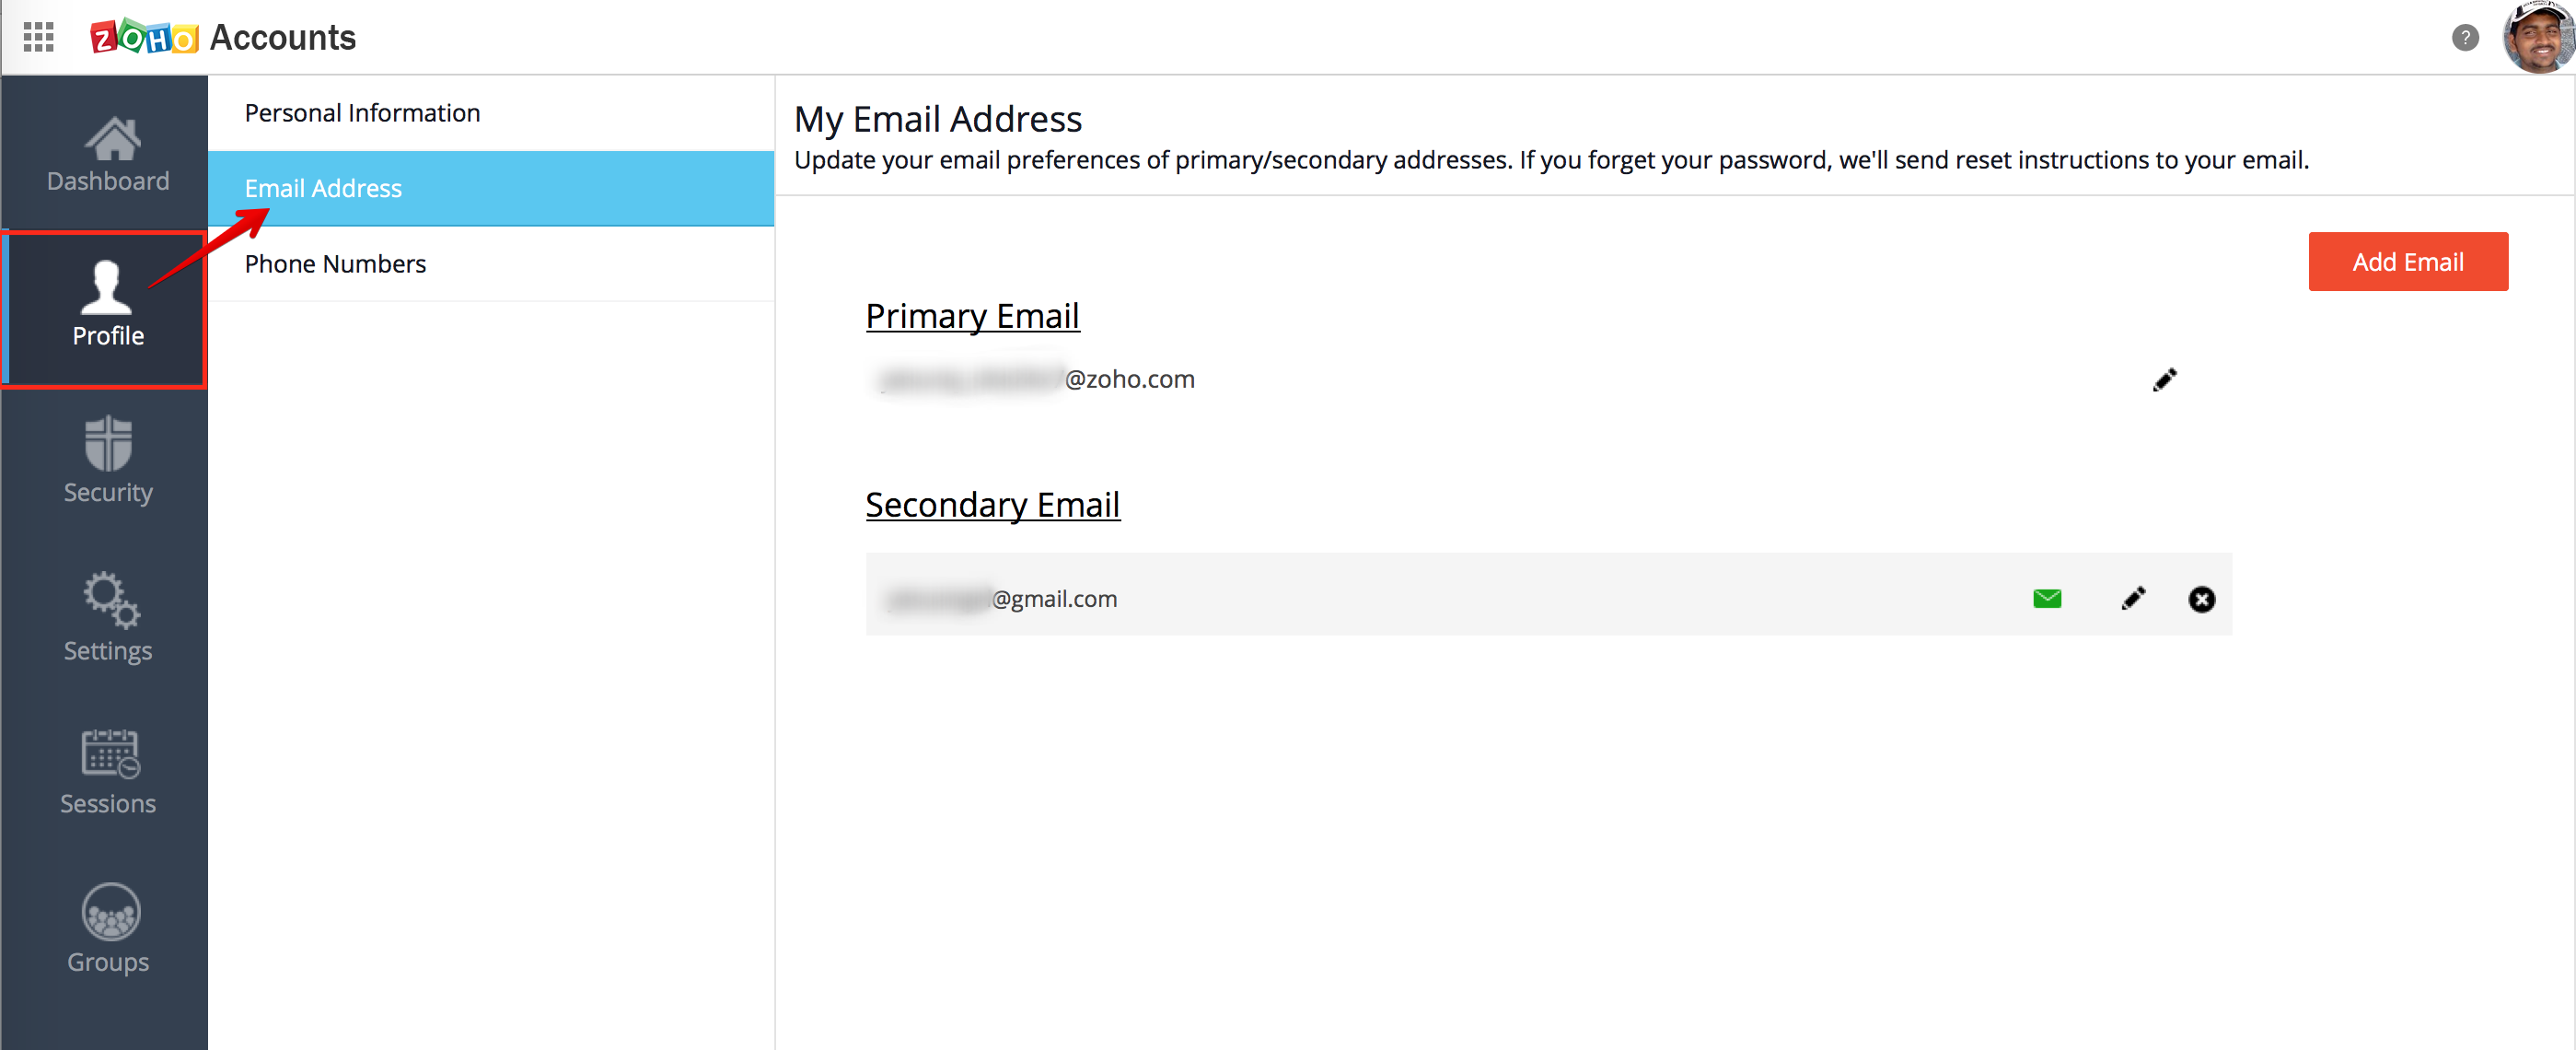
- Change Email Address: Update your email preferences for primary/secondary addresses. If you forget your password, Zoho accounts will send reset instructions to your email.
Note
- Why do I need an email address?
- How can I edit my primary email address?
- Can I add a new email address to my Zoho account?
- How do I make my new email address or secondary email address as the primary email address?
- How can I remove my secondary email address?

- Change Password: You can reset to a new password to manage your account.
Note
- What is my password?
- What should my password contain?
- If you have an Organization account, Zoho gives you the authority to set your own password criteria for your employees.
- I have forgotten my password. What do I do?
- I want to change the password for my Zoho account. How can I do that ?
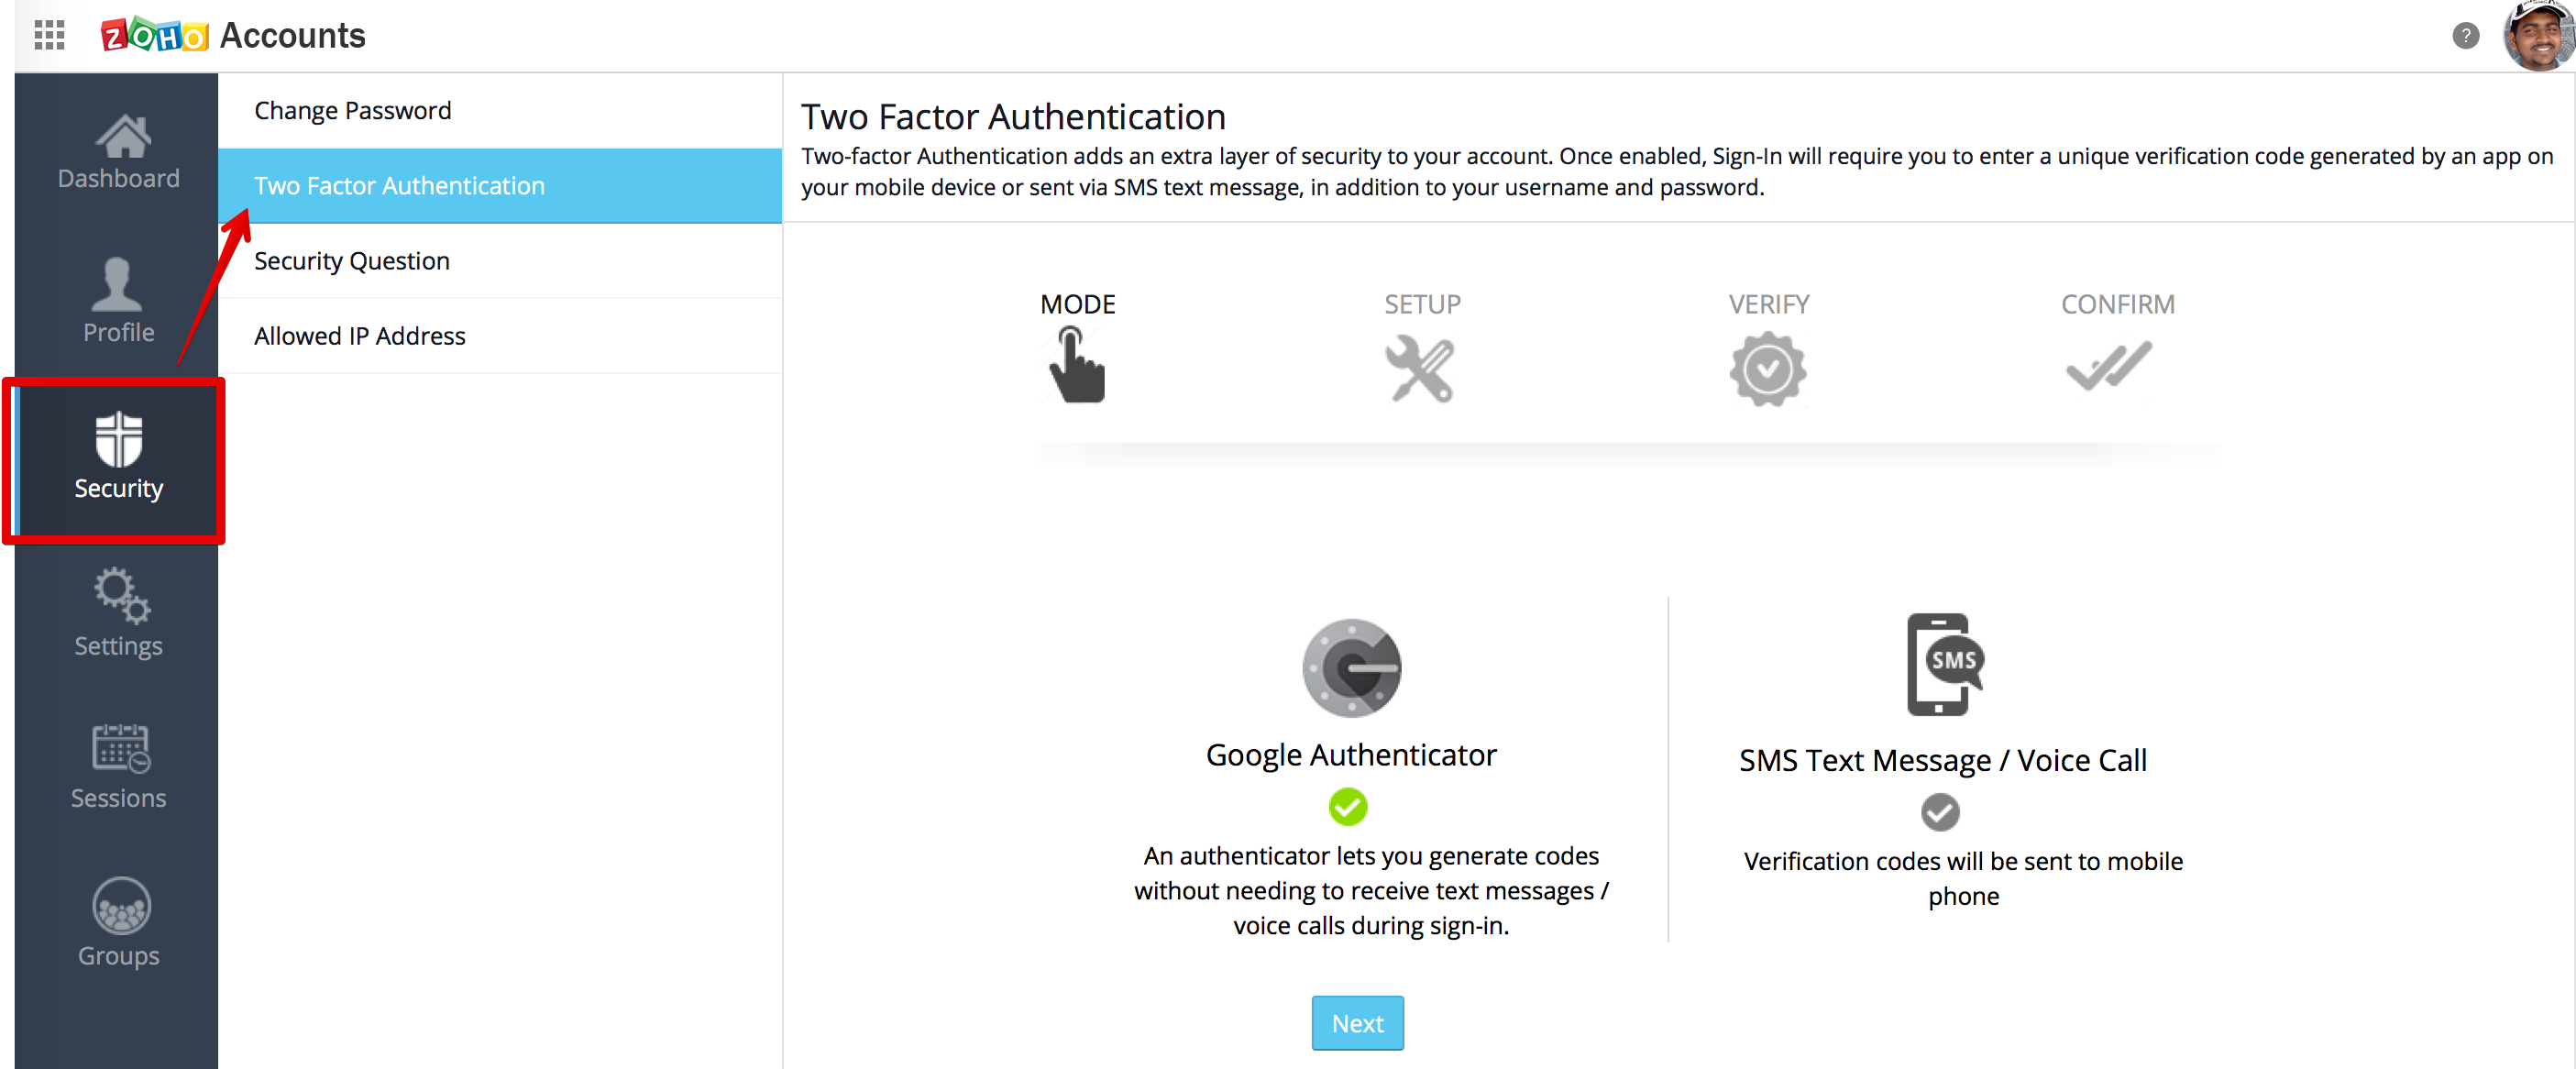
- Enable Two Factor Authentication: In addition to your username and password, you will have to enter a unique verification code generated by an app on your mobile device or via SMS.
Note
- What is Two Factor Authentication?
- How does the Zoho TFA function?
- How can I enable my TFA?
- How can I use Google Authenticator to enable TFA?
- How can I disable my TFA?
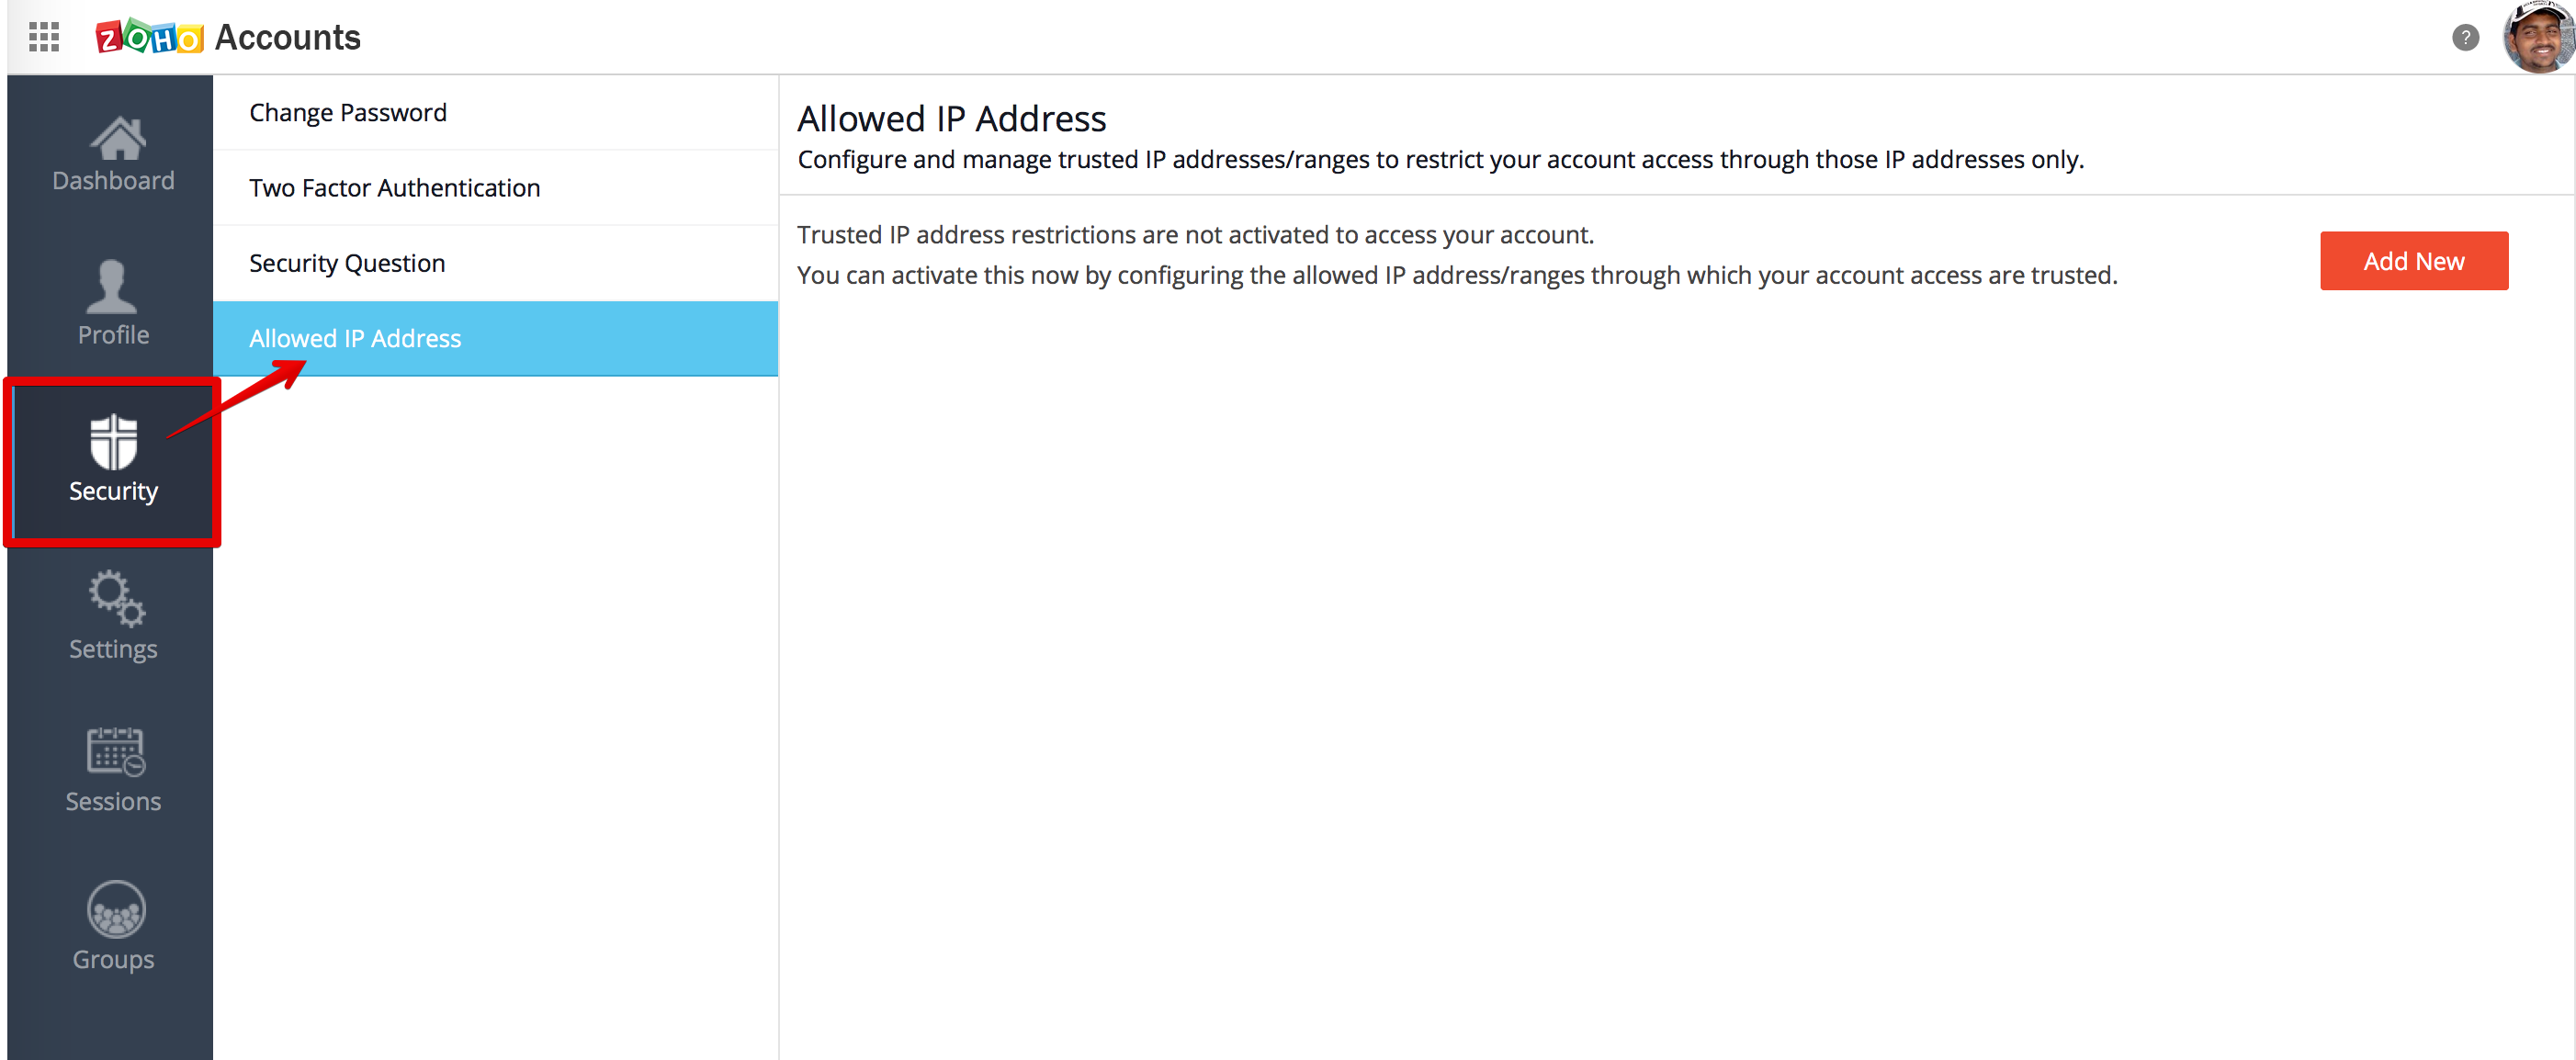
- Restrict IP Adresses: Configure and manage trusted IP addresses/ranges to restrict your account access through those IP addresses only.
NoteLearn more about Allowed IP addresses.
Account Settings
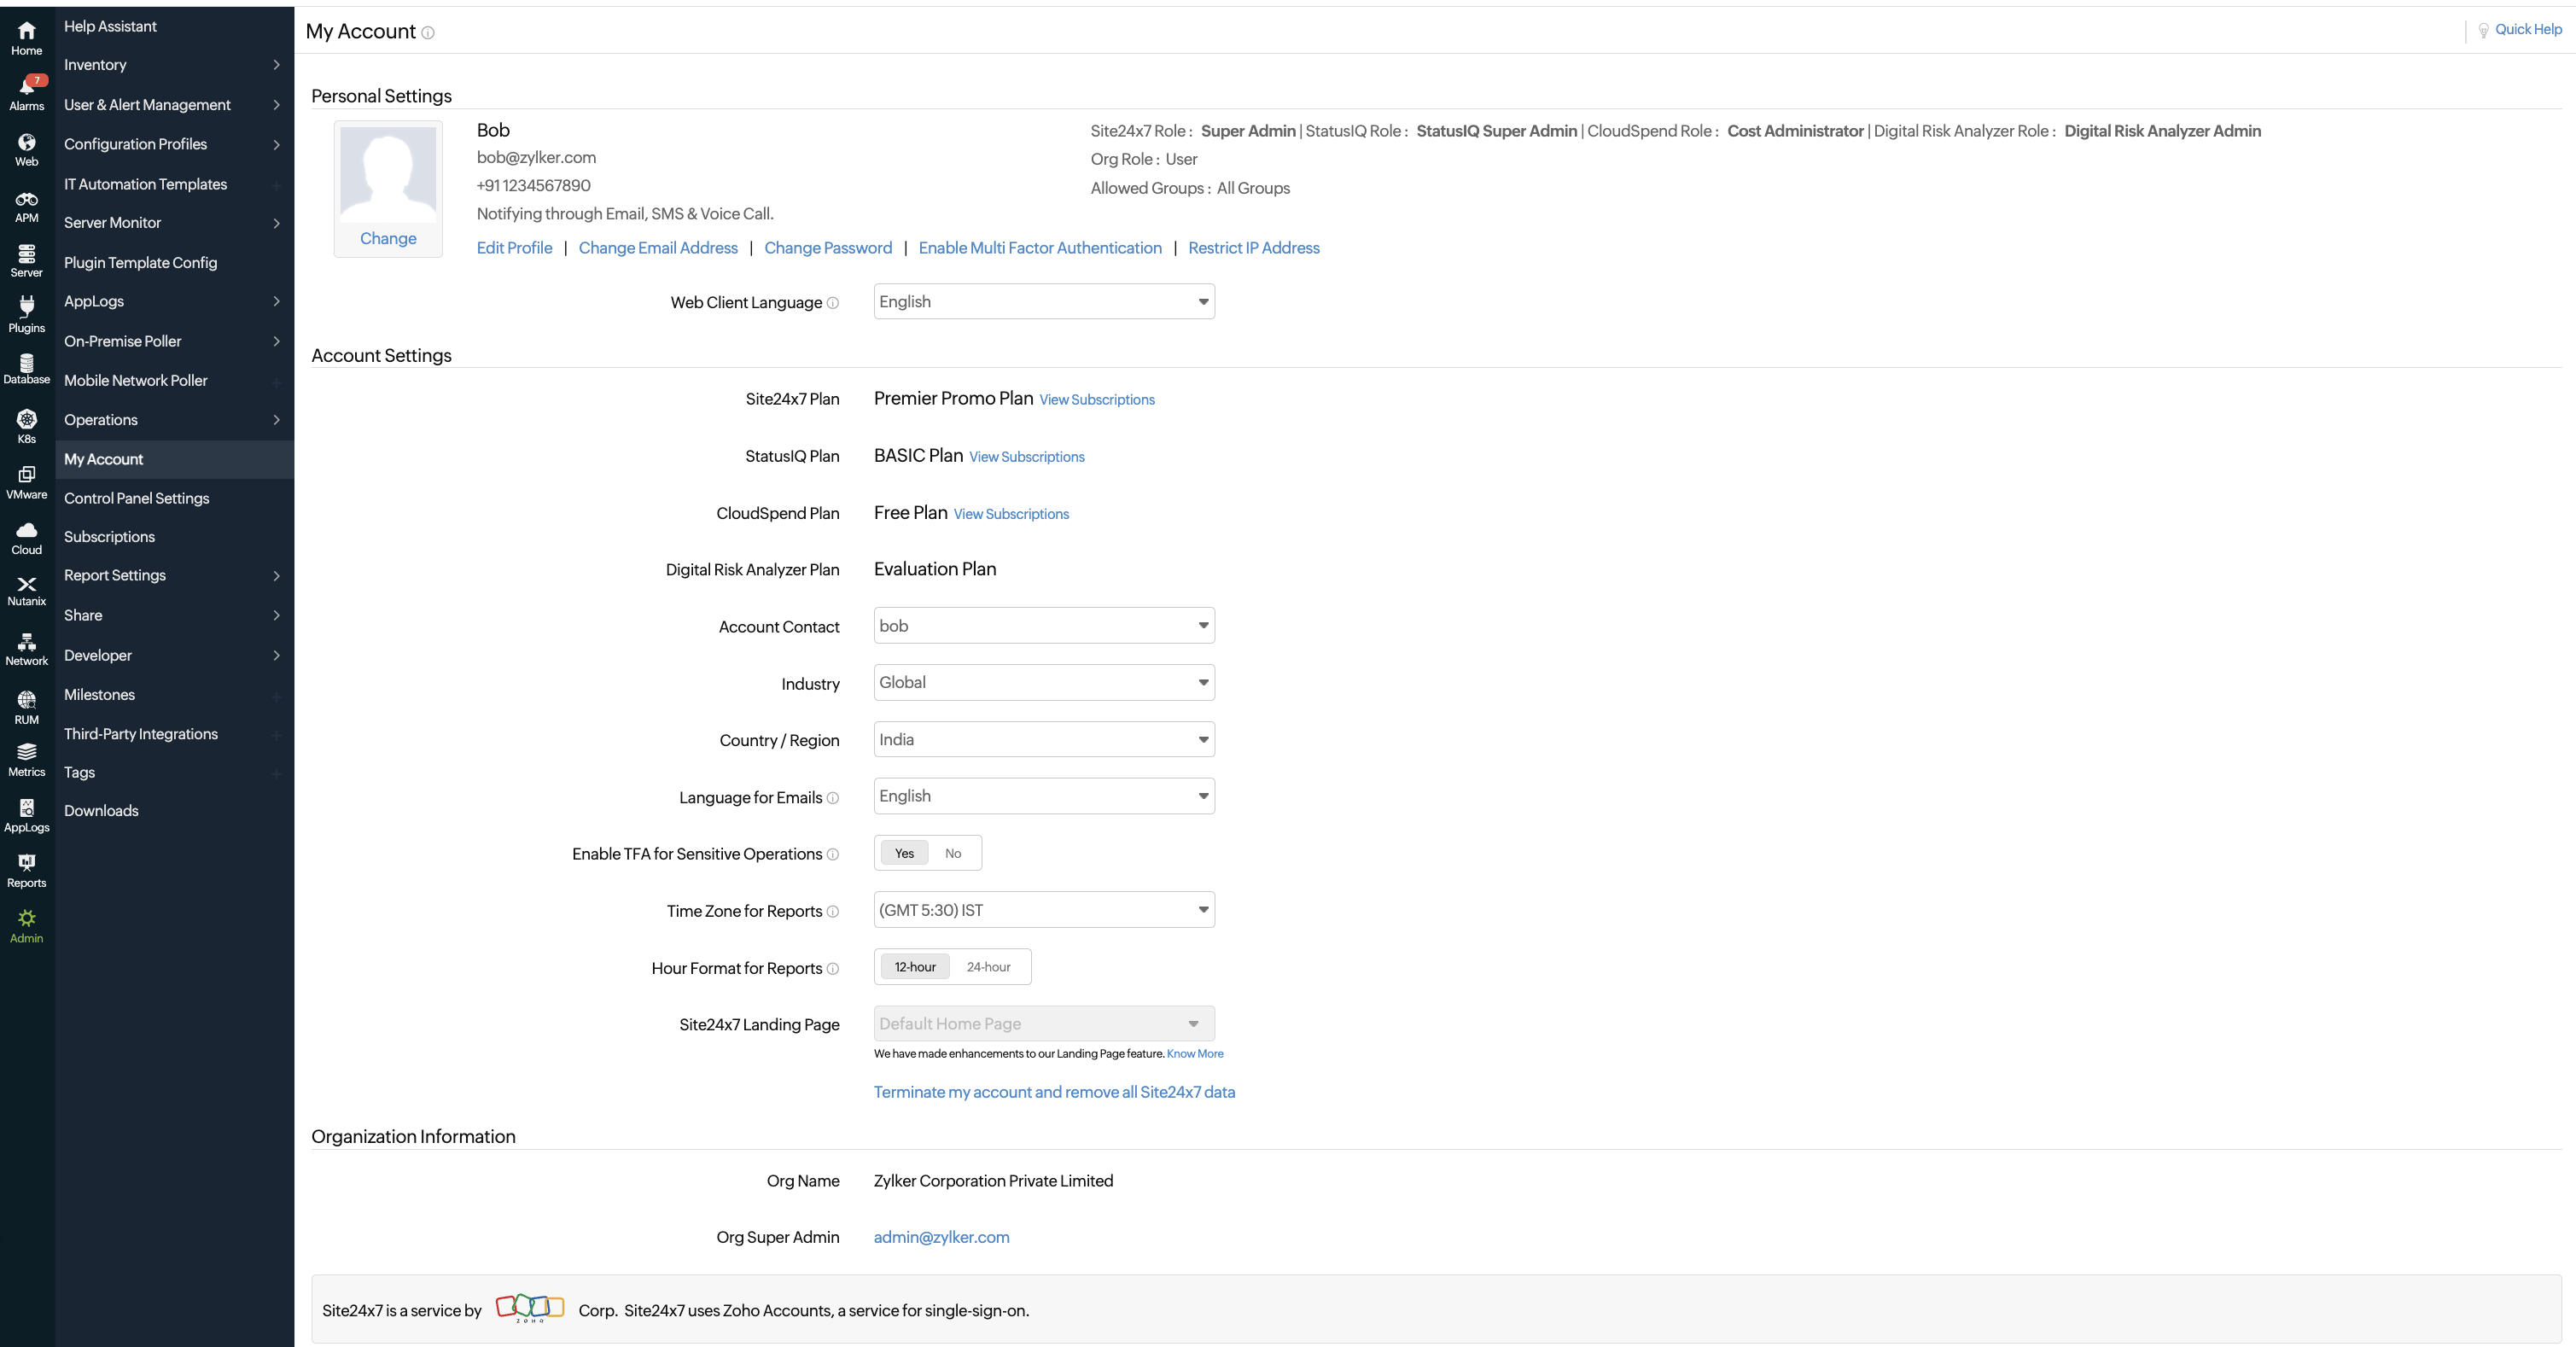
- Click Admin > My Account.
- You can view and edit your account settings:
- Web Client Language: Choose your language preference for the web client. You'll be viewing all information on the web client in this language.
- Site24x7 Plan: View your current subscription plan name and details for Site24x7.
- StatusIQ Plan: View your current subscription plan and details for StatusIQ.
- CloudSpend Plan: View your current subscription plan and details for CloudSpend.
- Digital Risk Analyzer Plan: View your current subscription plan and details for Digital Risk Analyzer.
- Industry: Choose the industry vertical to which your organization is associated.
- Country/Region: Choose your country name from the drop down.
- Language for Emails: Choose the language of your preference for scheduled reports and alert emails. For Site24x7 and CloudSpend you can choose the language of your preference for scheduled reports and alert emails. For StatusIQ, choose the language of your preference for incident related emails and web client.
- Enable TFA for Sensitive Operations: Enable Two-Factor Authentication (TFA) to receive verification push notifications on your Site24x7 mobile application whenever you perform a sensitive action. This added layer of security enhances protection for critical operations within the platform.
- Time Zone for Reports: Change the time zone manually according to your requirement from the drop down list. All reports are generated based on your selected time zone. Learn more. This is applicable only for Site24x7 and CloudSpend.
- Hour Format for Reports: Use the toggle button to apply 12-hour format or 24-hour format for the time displayed in charts and reports. This is applicable only for Site24x7.
- Site24x7 Landing Page: The option to set the landing page is disabled on this page, as we have made some enhancements. Know more.
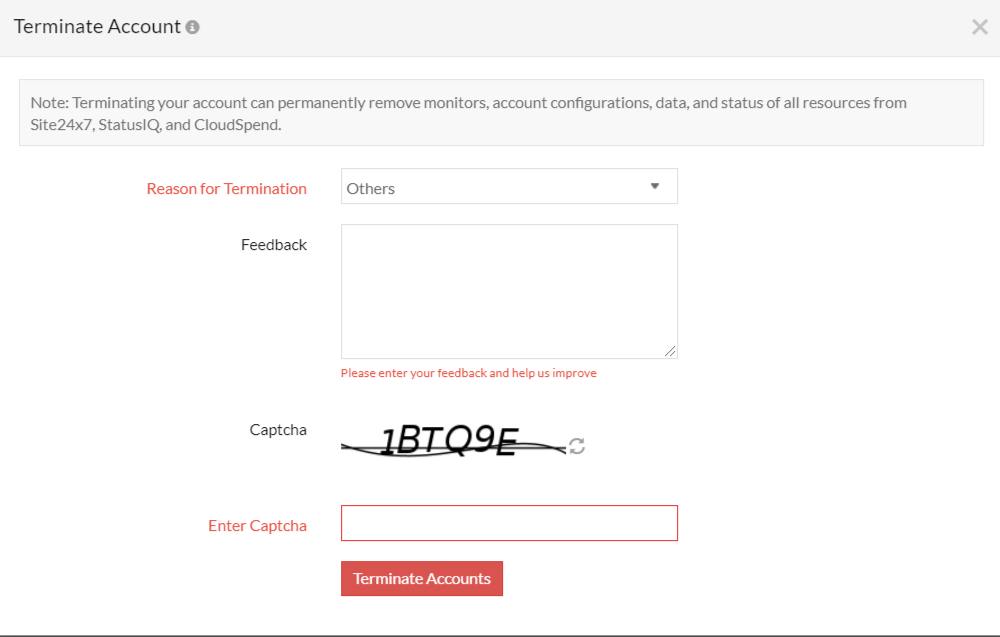
- Terminate Account: This option can be used to terminate your Site24x7, Site24x7 StatusIQ, and Site24x7 CloudSpend accounts. For eval and free users the account will be terminated immediately whereas paid users will be provided a grace period of three days to revoke termination.
NoteBy terminating your account, all the data and configurations in all the three Site24x7 products (Site24x7, StatusIQ, CloudSpend) will also get deleted. However, your Zoho Organization account will not be deleted by this action. Once you opt to terminate your account you'll be receiving notifications for the next three days, and you'll be provided with the option to revoke termination within that time.
Read more about the termination process here.
NoteRead about terminating a duplicate Site24x7 account
Organization Information
To perform organization-related actions like modifying the name of your organization, restricting IP addresses, or for enabling MFA, you can use Zoho Directory.
- Click Admin > My Account.
- You can view and update your organization settings. Your organization name and organization super admin email addressare listed here.
- Enable Two Factor Authentication: Two factor authentication is an additional security process to secure your account by a combination of your password and a mobile device. This reduces the chance of your account being hacked into and protects your data with extra secure measures.
- Restrict IP Address: The administrators can enable IP based restrictions for the organization users. This will enable additional security to the accounts and allow the login to the accounts only from the defined IP ranges.
The IP restrictons can be set at various levels and combinations. When IP restrictions are enabled for an account, and the user tries to login from a different IP range, the user gets the following error message: "Access from this machine is denied." - SSO with SAML based Authentication: The purpose of SAML is to enable Single Sign-On for web applications across various domains and services.
Enable Two Factor Authentication
Restrict IP Address
Set up Single Sign-On (SSO) for Site24x7 with SAML based Authentication
What is SSO?
Before understanding what Single Sign-On is we must go through how traditional authentication works.
- A service will present the user with a login page where the user must submit a set of login credentials i.e., username and passwords. Some services might ask for more authentication information such as a one-time password.
- The credentials submitted by the user are validated against the ones present in the database at the service.
Traditional authentication is quite intuitive; everything is managed within the service, providing a simple way for users to authenticate. However, if a user needs to access multiple applications with a different set of login credentials for each application, it quickly turns cumbersome for the user. The user must remember multiple credentials and comply with different password policies.
Single Sign-On is a feature which lets you access Site24x7 as well as third-party applications with a single submission of user credentials. Users aren't required to remember an array of usernames and passwords for each application they need access to. Site24x7 is a service by Zoho, and use Zoho Accounts for SSO using SAML.
What is SAML?
SAML - Security Assertion Markup Language, developed by the Security Services Technical Committee of "Organization for the Advancement of Structured Information Standards" (OASIS), is an XML-based framework for exchanging user authentication, entitlement, and attribute information. SAML is a derivative of XML. The purpose of SAML is to enable Single Sign-On for web applications across various domains and services.
Using Assertion Markup Language (SAML), a user can use third-party access management services like Okta, ADFS, Azure, OneLogin etc. to sign into Site24x7 via Single Sign-On (SSO). To configure and use SAML authentication for your organization, you need to provide SAML URLs and the public key provided by the SAML/IdP service you have chosen. However, you must be the Super Admin of the account to set up SSO via SAML. Follow the steps below to setup SSO for accessing Site24x7 with SAML based authentication:
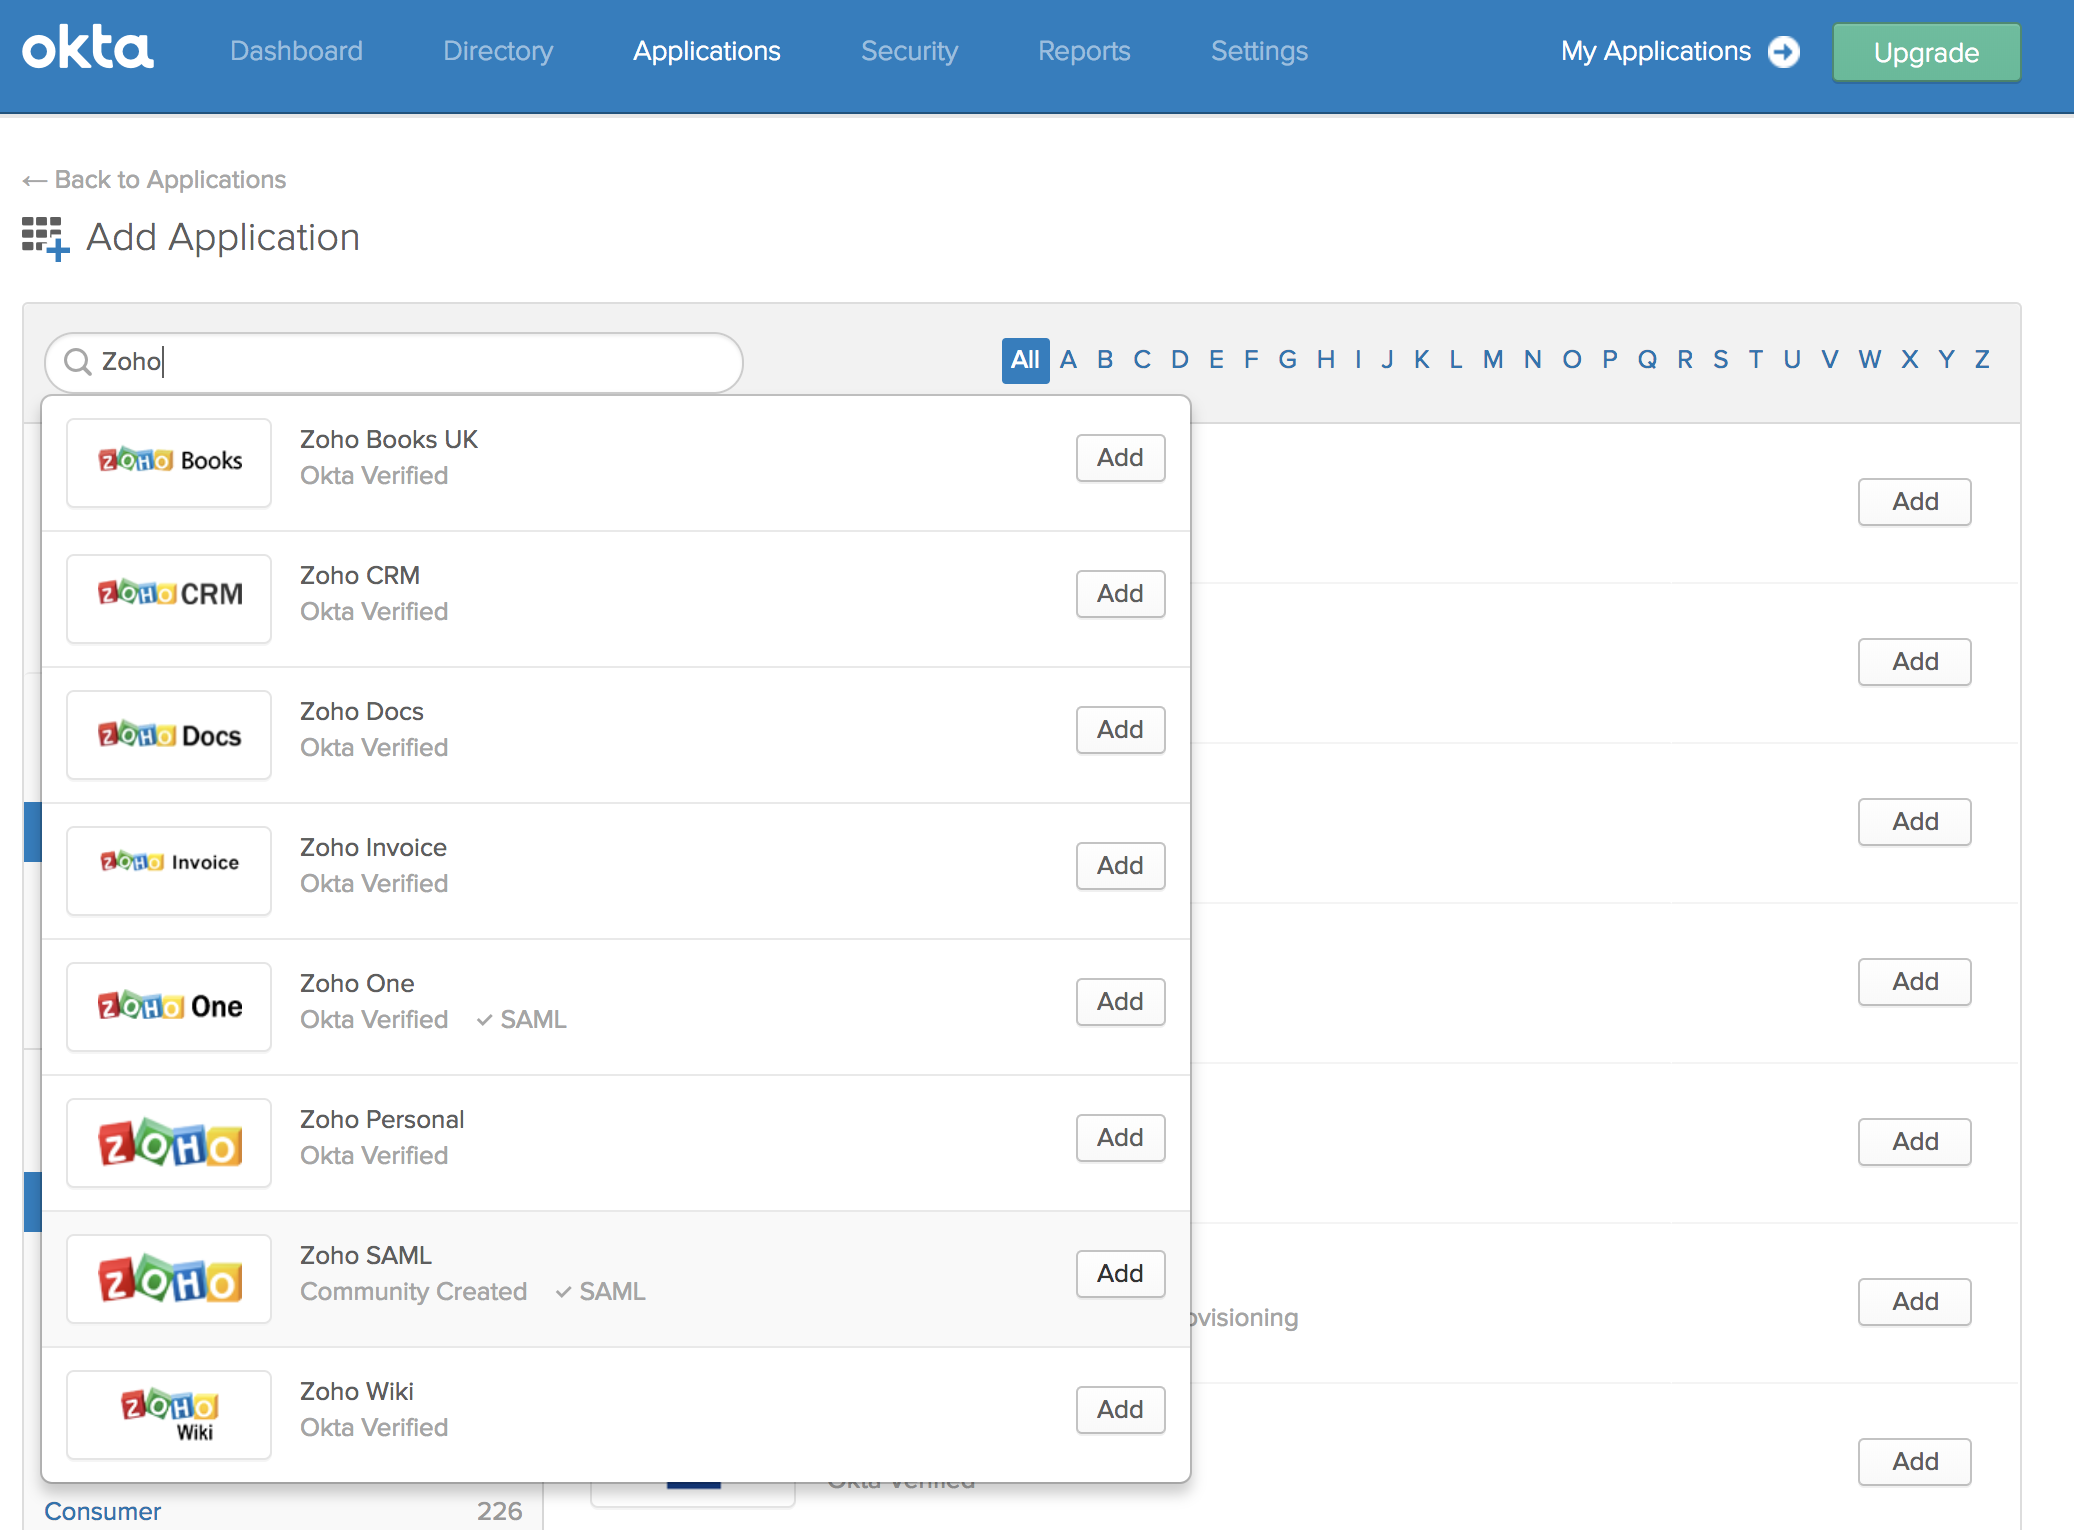
- Inside your access management app, select Zoho SAML. Also, obtain the Login URL and Logout URL for your configuration needs.
- You'll be redirected to Zoho Accounts (Site24x7 uses Zoho Accounts for SSO) page, where you would be asked to configure Single Sign-On URL and Entity ID URLs at Zoho.
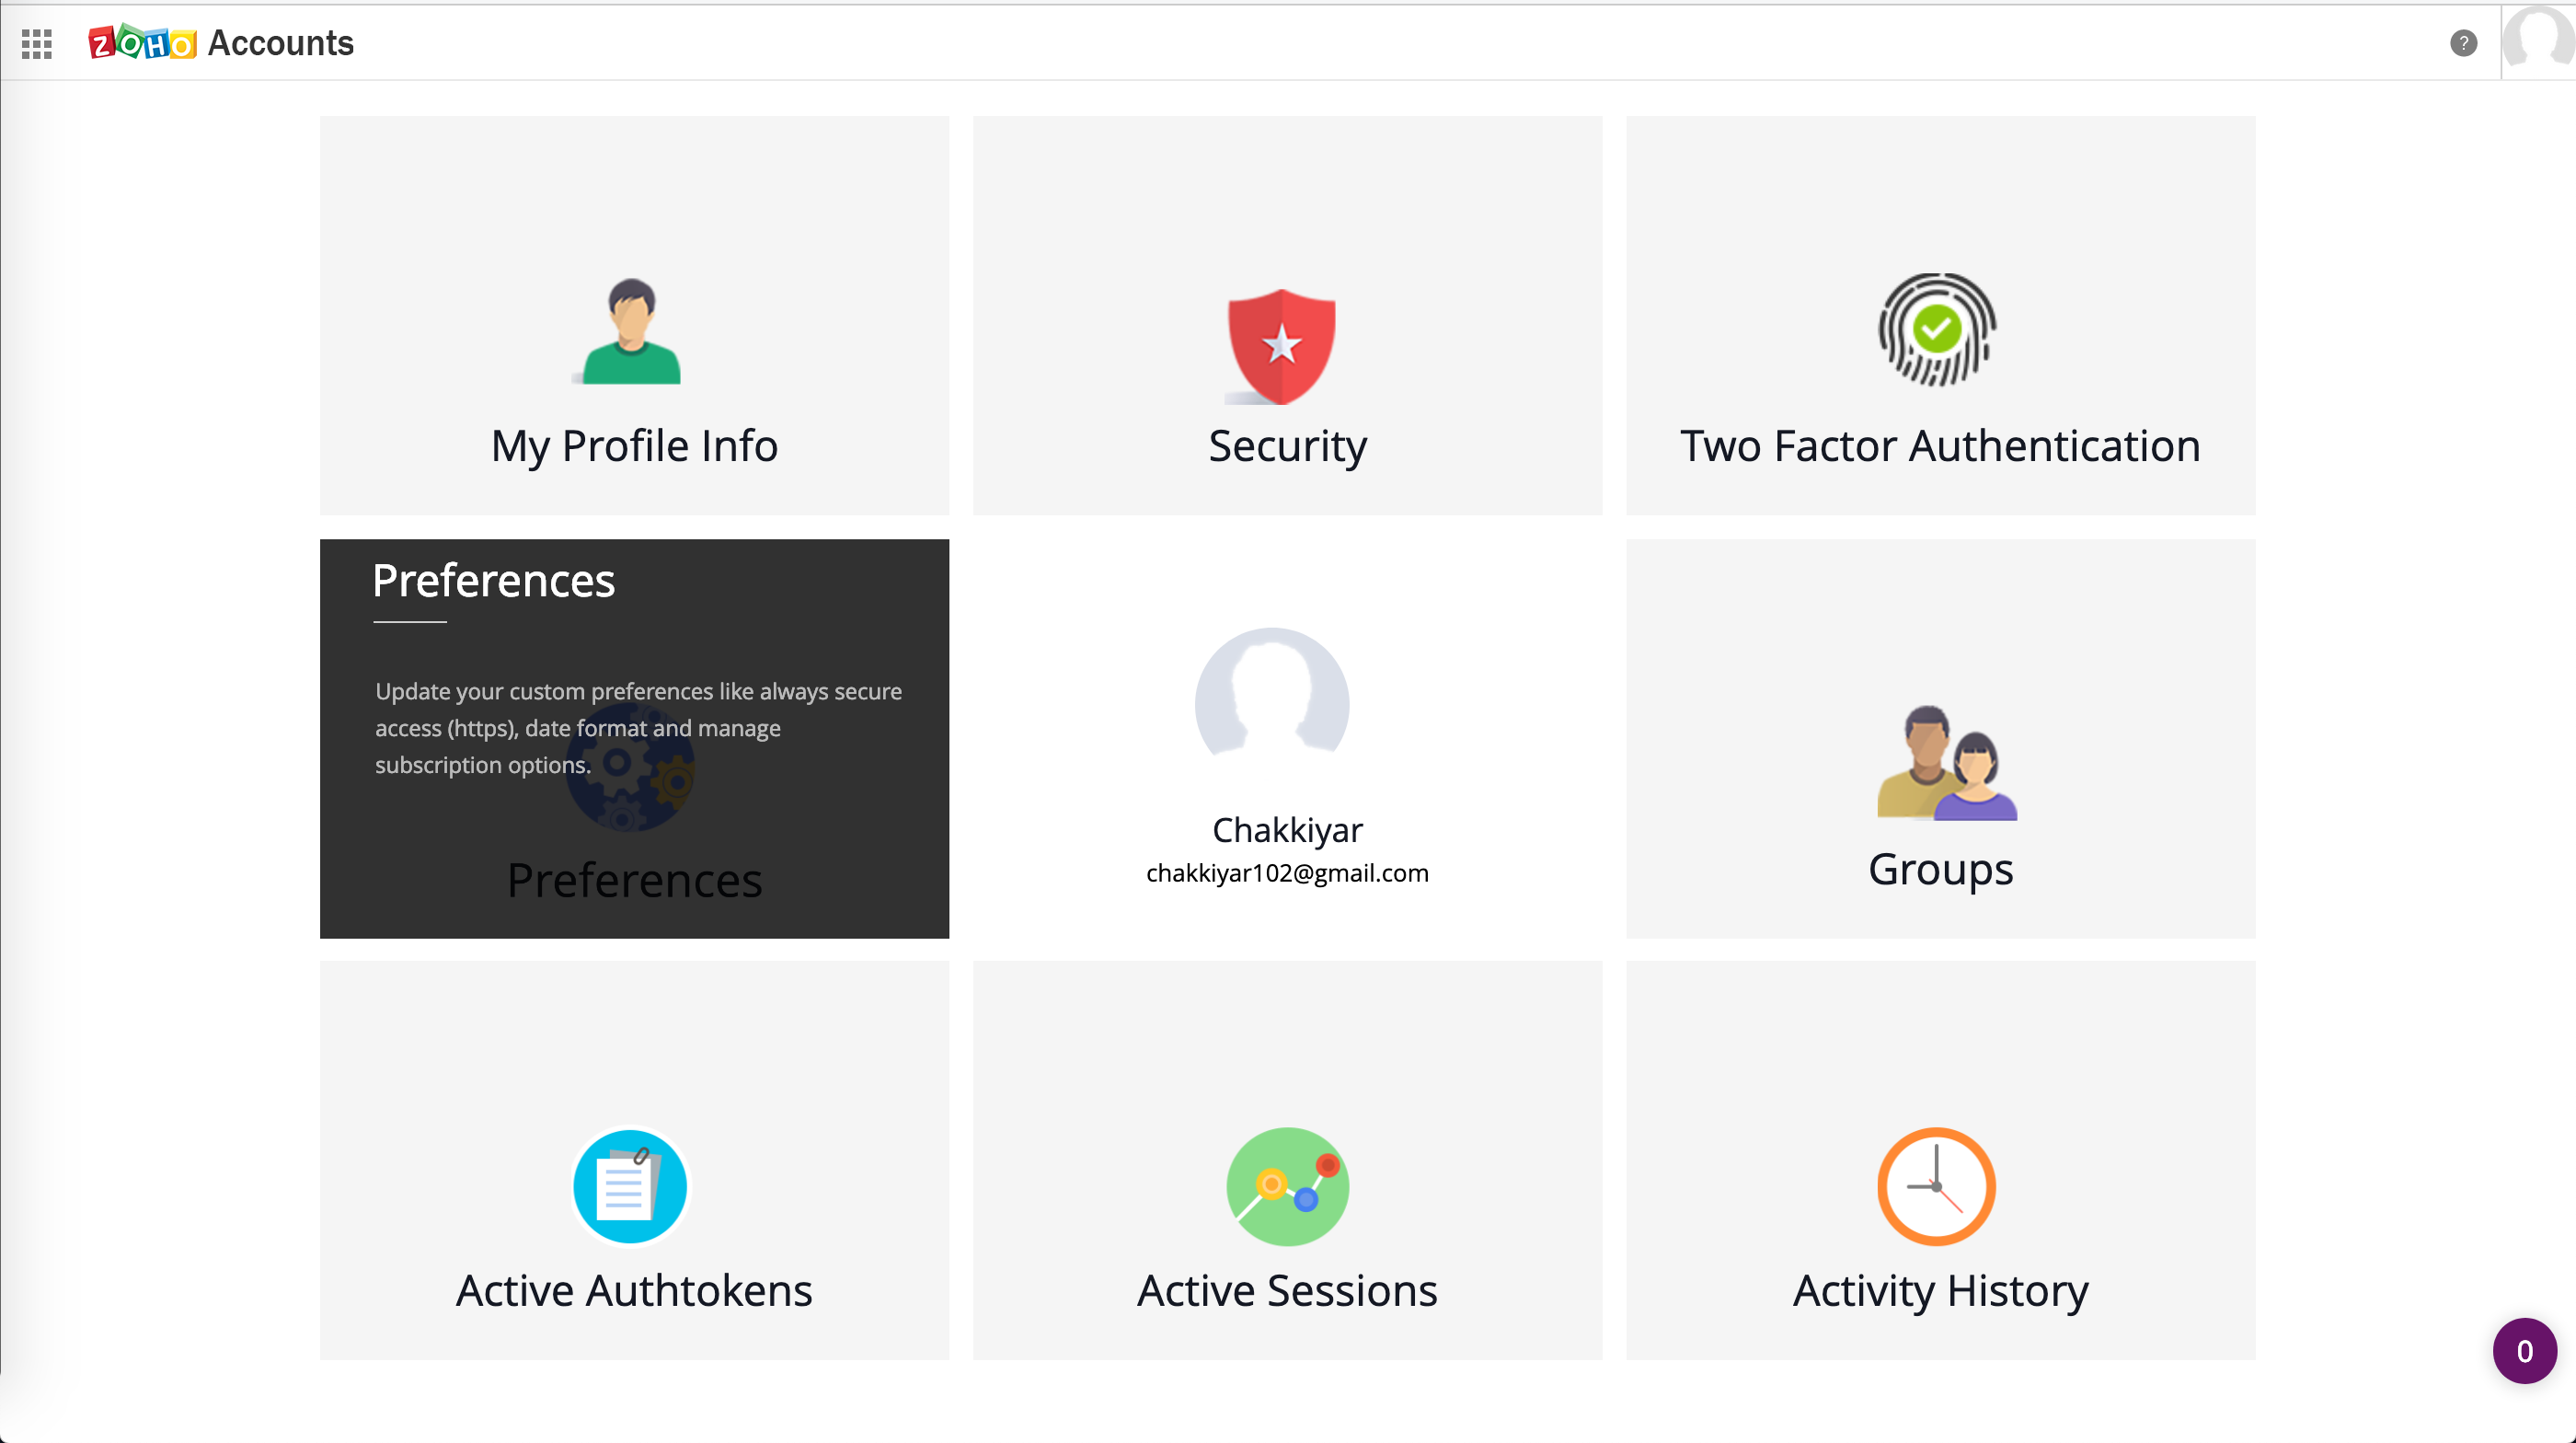
- Click the Preferences tab > Navigate to Settings > SAML Authentication > Setup Now.
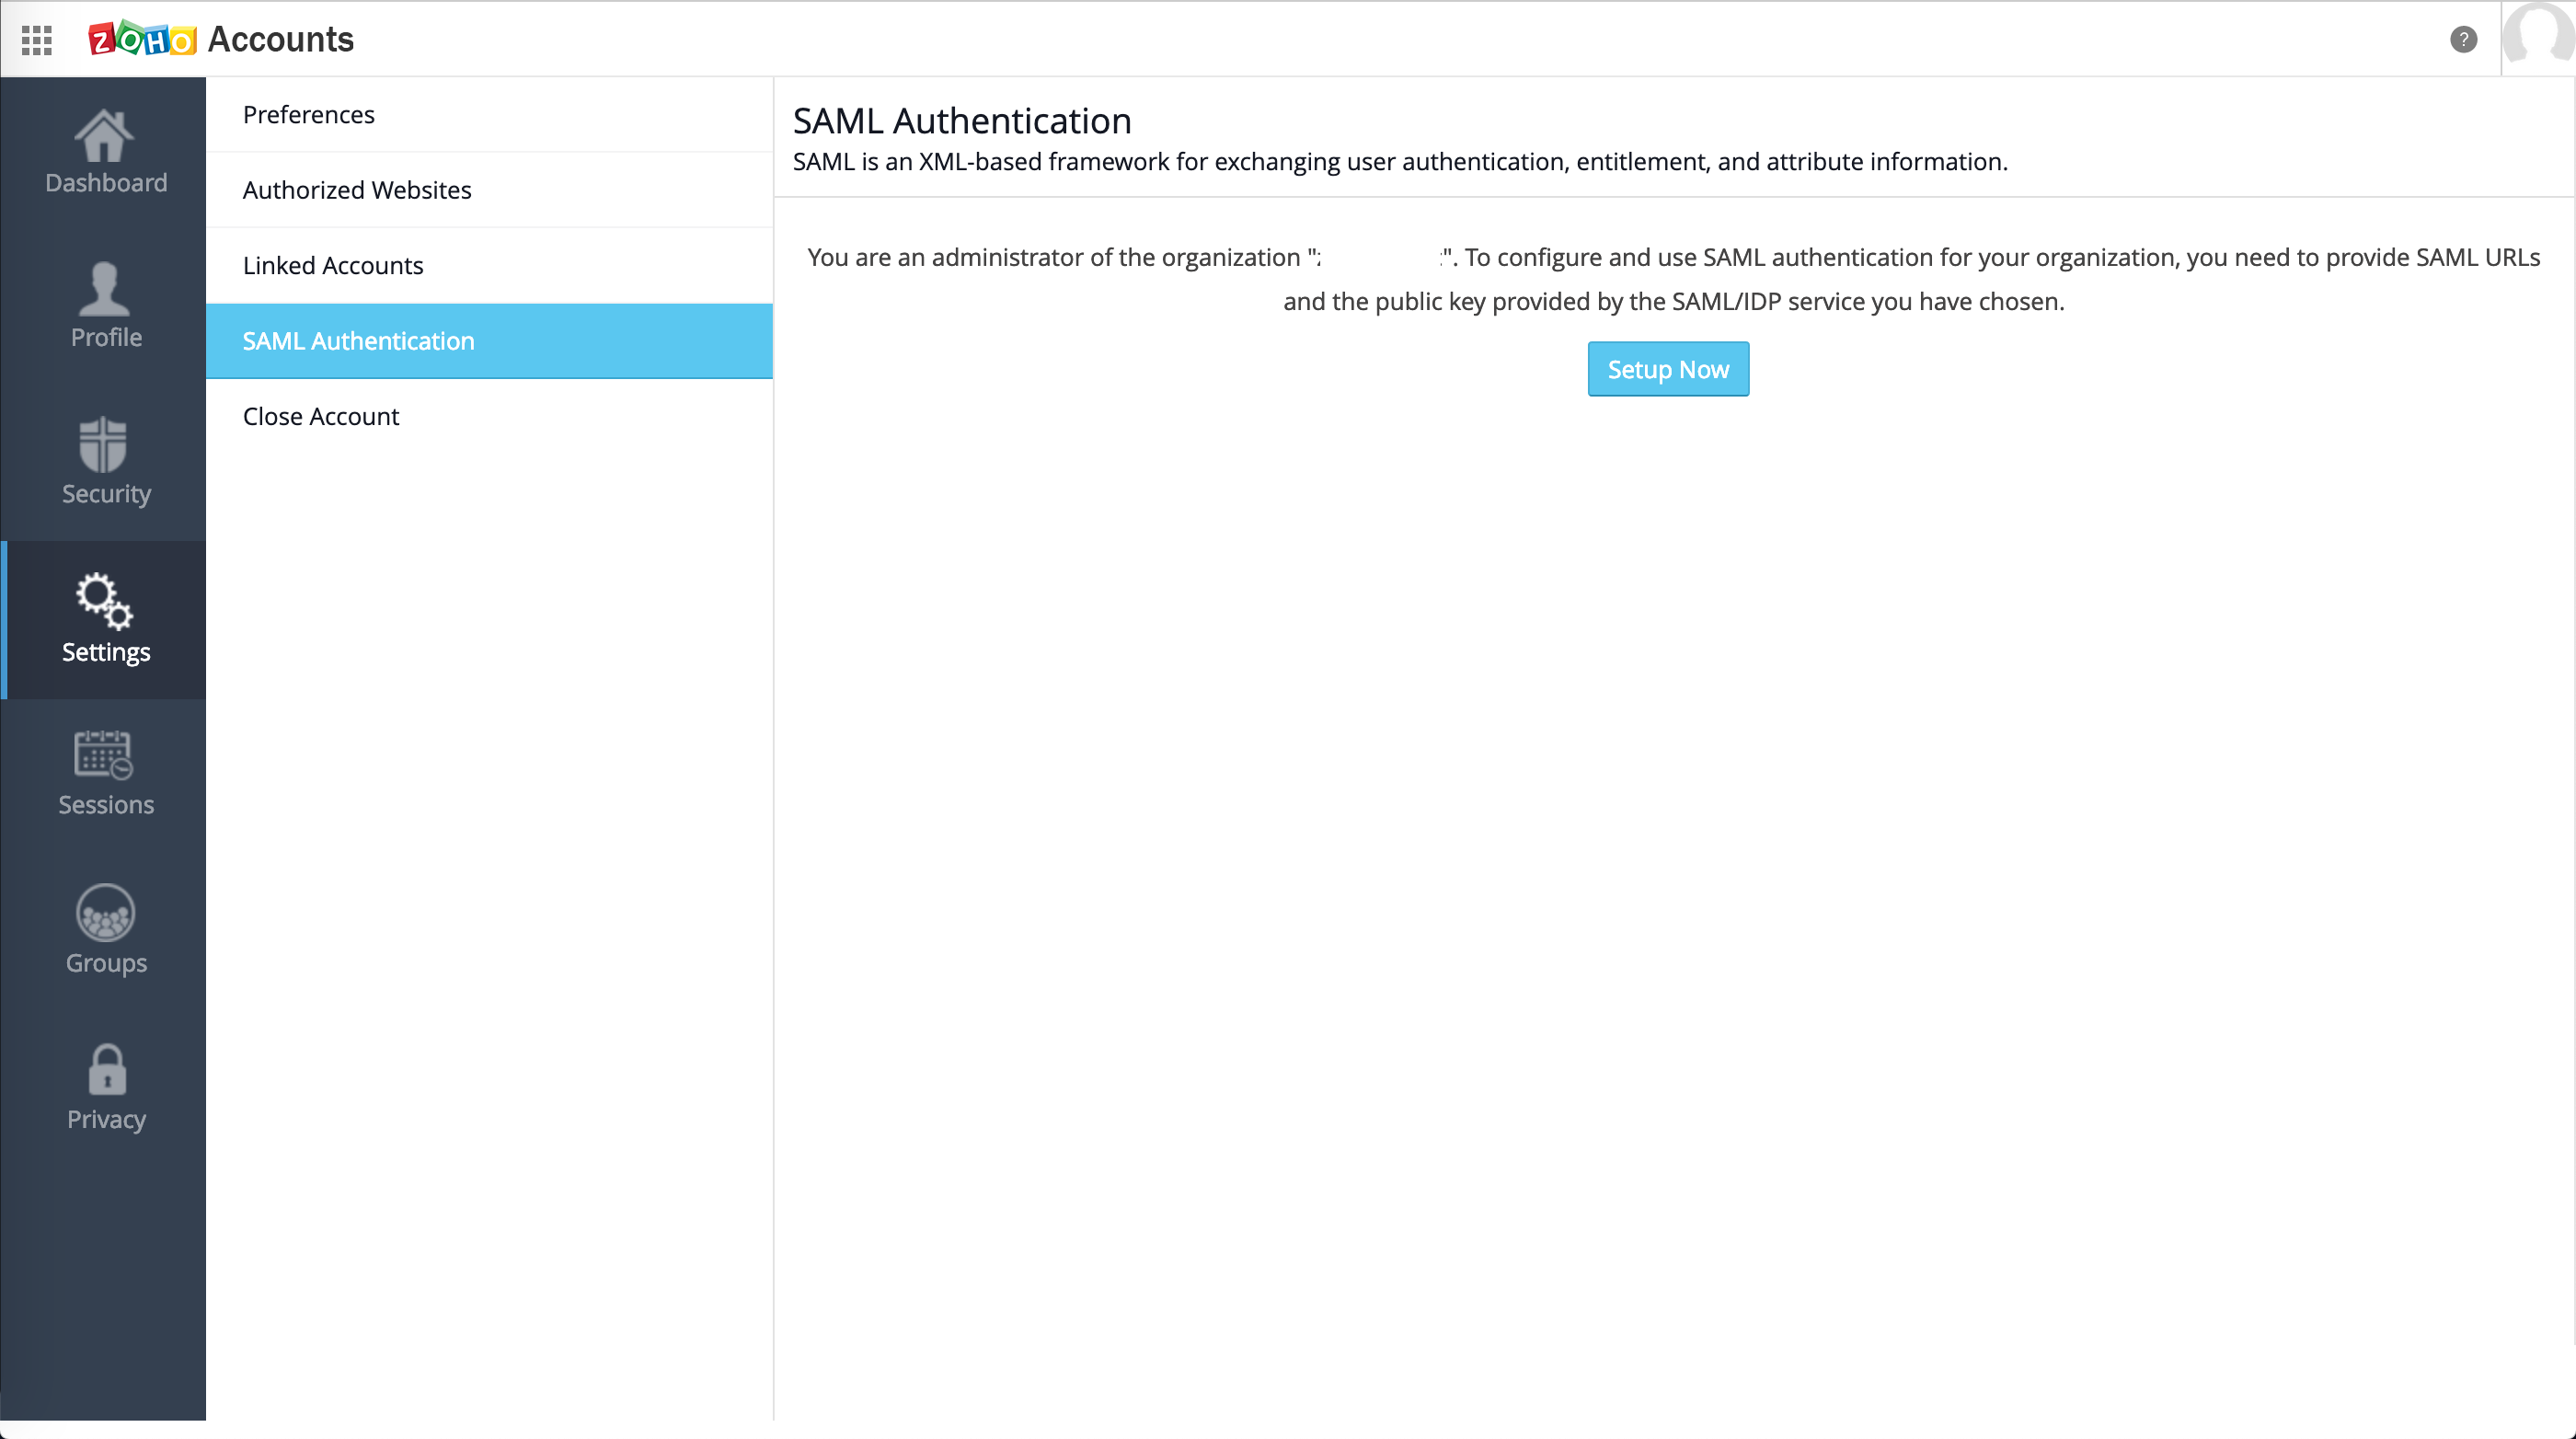
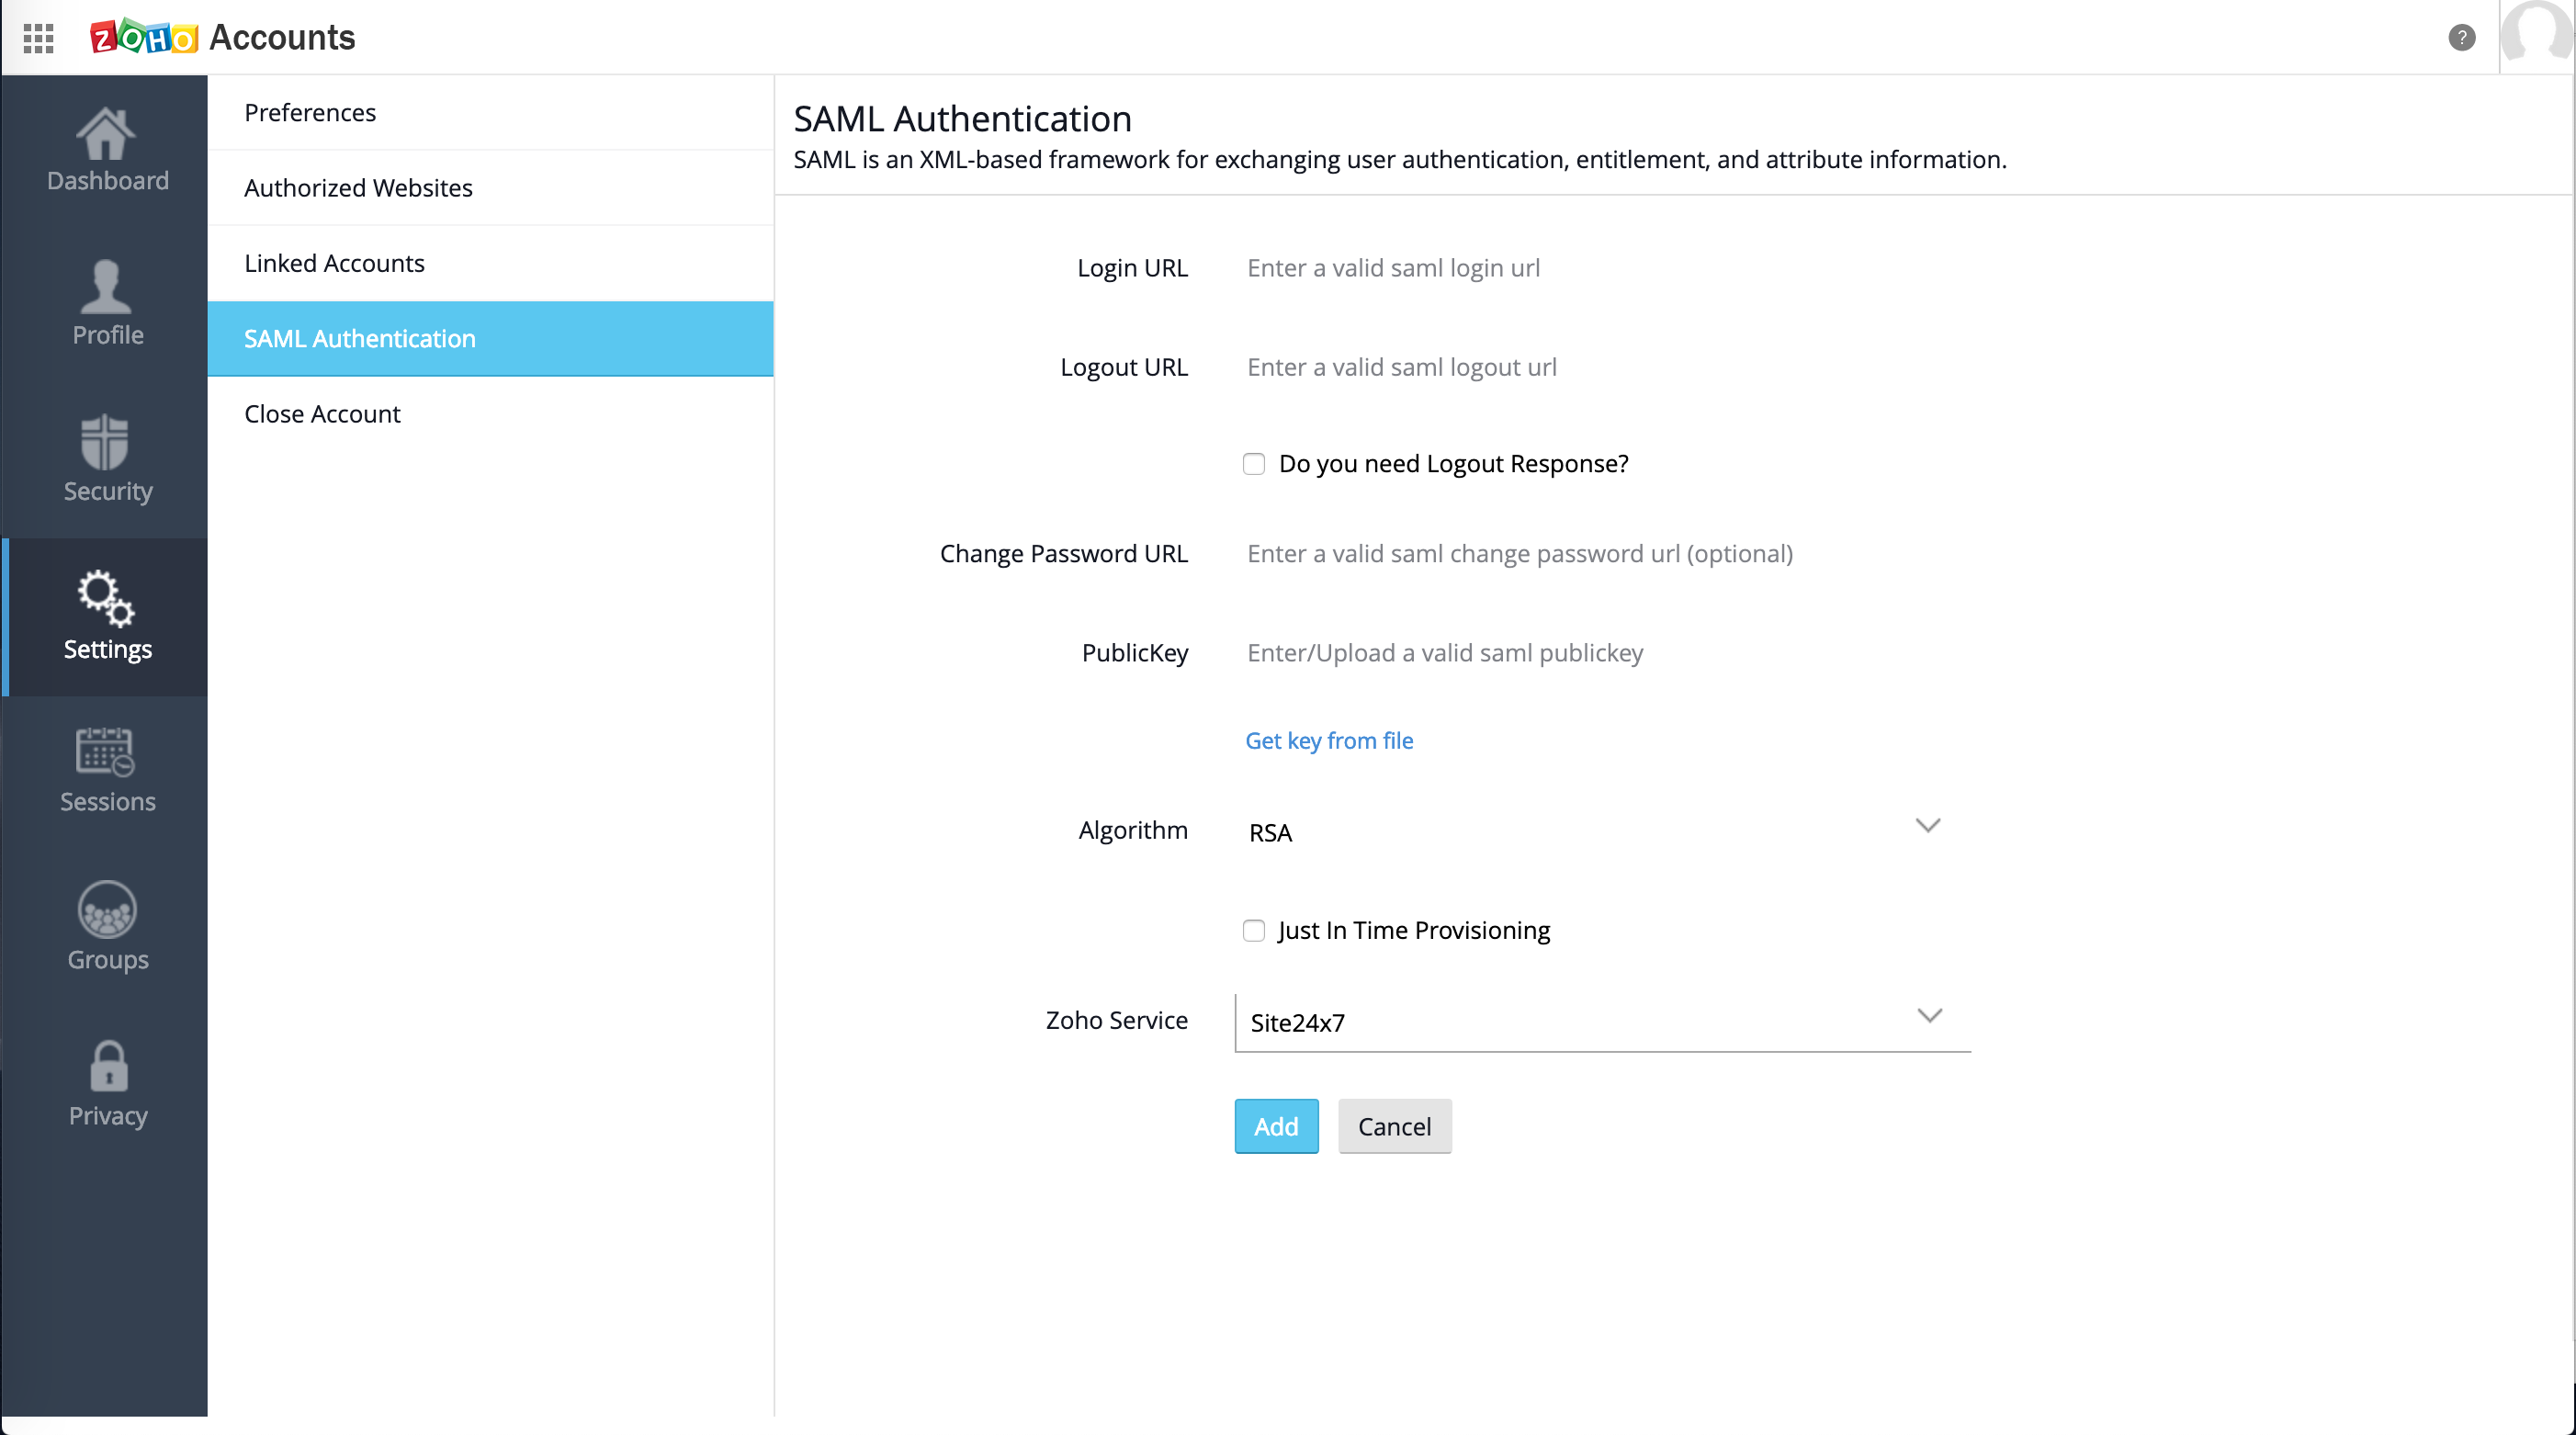
- Now fill the configuration details for the SAML, provided by the third party Identity provider (IdP) or a SAML supported system like the Active Directory. The parameters required for SAML configuration includes:
- Login URL: The IdP URL where the user gets redirected to for authentication at IdP.
- Logout URL: The IdP URL where the user gets redirected to after logging out of Zoho.
NoteTick the checkbox if you need a logout request/response sent to your IdP.
- Change password URL: The IdP URL that the user will be redirected to in case they want to change their account's password.
- Public key: The certificate with which Zoho can check the digital signature on the SAML assertion response.
NoteMake sure the key is a base-64 encoded .cer, .crt, .cert, or .pem file. We don't accept any other format for the certificate.
- Algorithm: The algorithm with which the PublicKey is generated.
- Just in Time Provisioning: Check this tick-box if you want a user from your IdP to be added to Zoho impromptu. We will add them to Zoho after validating the SAML Response and their domain.
- Zoho Service: Pick Site24x7 from the drop down and click the Add button.
- You can enable or disable SAML for your organization by using the status dropdown menu.
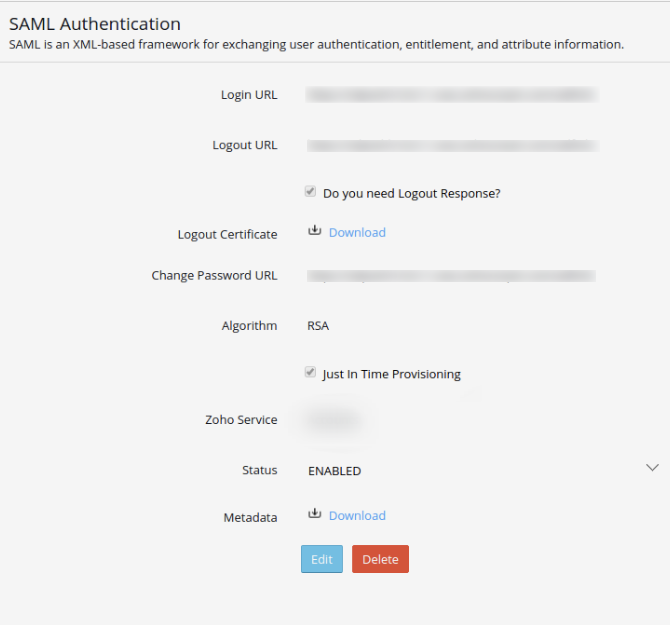
- Click Download to download the metadata file. The metadata file contains information you need to provide to your IdP.
NoteAn Org Super Admin will be able to login only using Zoho credentials(Zoho password)for security and recovery reasons. They will have the permission to manage the SAML authentication of all other users in the Org, and they can exclude any user from SSO login. However, the users cannot have both Zoho password and SSO access at a time.
Add Users
Learn how to add users, user groups, and more.
